Reed Bunting, Emberiza Schoeniclus

Mrs Sciencebase and I opted to follow the footpath from the RSPB Ouse Fen (Earith) car park to what we refer to as the “Clouded Yellow Field”, which is the patch where we saw that butterfly in numbers in 2022 and that leads on to Brownshill Staunch where I spotted the previously mentioned Sandwich Tern.

Male Reed Bunting, Emberiza schoeniclus, RSPB Ouse Fen, perched on Rape, Brassica napus (AKA "canola" in the US).
Male Reed Bunting at RSPB Ouse Fen, perched on Rape plant

It’s a nice stretch to stretch one’s legs. Lots of Marsh Harrier activity over the reed beds, Chinese Water Deer and Roe Deer to see. Calls from Sedge Warbler, White Throat, Chiff Chaff (all warblers). We could hear some Bearded Reedling calling and Bittern booming and saw two different pairs of that latter species flying over the reedbeds. Also plenty of Reed Bunting around resplendant in their breeding plumage.

If this bird were named in the same way as one of its close relatives, Emberiza citrinella, it would be called a Reedhammer (as in Yellowhammer, where “hammer/ammer” is old German for “bunting”. Of course, in  modern German the Yellowhammer is the “Goldammer”, while the Reed Bunt is “Rohrammer”, Rohr meaning pipe and presumably alluding to the pipe-like reeds.

In my photo you can see an example of why it’s important to get a catchlight in the eye of a bird or other animal. Without that tiny glint of reflected light, the eye would have little character and with a bird like this would be lost against the black of its facial plumage.

I used DxO PureRaw4 to do automatic lens and camera corrections and to denoise the RAW file from the Canon R7 (lens was Sigma 150-600mm at full extent). I then ran the DNG output from PureRaw4 through Topaz Sharpen AI v 4.1.0 to tighten up those feathers a little and then PaintShopPro Ultimate 2022 to tweak levels ever so slightly and to crop and add my logo. Camera settings: f/6.3, t 1/4000s, ISO 800.

The image below is an unedited JPG grab from the original camera RAW file

Upgrading your photographic workflow

Back in February, DxO sent me a beta version of their PureRaw4 software to test drive ahead of the official launch in March. So, having used version 3 for years, I was keen to incorporate the upgrade into my workflow. I’ve pushed it to the limit with a high-speed, low-light photo of a Mute Swan landing on a lake. This is the final result, below you can read how I got there from a very noisy RAW file straight out of the camera.

Mute Swan landing on a lake. Photo shot at 1/16000s and because of that the camera pushed the ISO up to 6400 to compensate. This has been denoised and sharpened with DxO PureRaw4 and then levels and other such matters adjusted slightly for the final image.
This is the final denoised and processed image – Mute Swan Landing

The bottom line is that PureRaw4 does an excellent job of basically knocking out noise to the equivalent of about three whole stops of ISO, fixing various aberrations inherent in one’s camera-lens combinations, and also applying a degree of subtle sharpening. I wrote a short summary around the time of their official launch when they emerged from beta testing.

Preview of the RAW file straight out of the camera
Preview of a RAW file straight out of the camera. Fast shutter (1/16000s) and so high ISO (6400). Zooming in on the Mute Swan’s head shows how noisy the original was.

My photography has various focal points – birds (flying and perched) snapped with a Sigma 150-600 on a Canon R7 and macro photos of moths, with a 90mm Tamron 1:1 lens, and commonly focus stacked. The focus-stacked output from the camera is JPEG, so inaccessible to PureRaw4 which requires a RAW file. But, the bird photos and landscapes, events, and architectural photography is always shot in RAW. So, a perfect fit for PureRaw4.

This image has been processed with PureRaw4 to remove noise without removing cdetail and to correct for known camera-lens errors automatically
This image has been processed with PureRaw4 to remove noise without removing detail and to correct for known camera-lens errors automatically and sharpen accordingly. The level of noise has been massively reduced.

The biggest problem with the big lens is hand-holding, and I rarely take a tripod for various reasons. Anyway, when the light’s fading, and I’m keeping shutter speed short to freeze the avian action, the camera will ramp up lens sensitivity, the ISO, and that makes for more photographic noise. My Canon 7Dii was the worst, I never got on with that. I do wish I’d had PureRaw back then, it would’ve been a lifesaver. But, the R7 its mirrorless successor, is not particularly over-noisy, thank goodness. However, there is always room for improvement. And PureRaw4 does wonders for my twilight owl shots, for instance.

The same zoom on the image after a little processing with PaintShopPro to adjust levels.
The same zoom on the image after a little processing with PaintShopPro to adjust levels and apply an unsharp mask.

Anyway, in terms of workflow, as I’ve mentioned you must be shooting in RAW. You will get the most from your photography if you take control in that way. RAW gives you all the information that the sensor captures in your shot. RAW is your digital negative.

So, my first step, having selected an appropriate shot I’d like to use from my downloaded photoshoot, is to open the RAW file. You might prefer to open multiple files or to import and process semi-automatically, but I prefer to work with one photo at a time. You let the software download the requisite files for your camera-lens combination. And, then choose your settings. I go for the high-end algorithm (DeepPrime XD2) and allow the software to do the default lens softness, vignetting and other fixes. PureRaw4 runs faster than its predecessor in tests.

Often my photos are at 600mm zoom on a 2/3 frame camera, with a shutter speed of less than 1/2000s, f/6.3 aperture almost by default and then whatever ISO the camera chooses. If it’s dusk or dull, that ISO number will inevitably be way too high and there will be noise. As per the Mute Swan photos example. I’d used a very short shutter speed, 1/16000s, which mean the ISO was at 6400 as the aperture is f/6.3 at this zoom. It’s like dropping three whole stops to ISO 800.

PureRaw4’s algorithm strips away the speckles without stripping away the detail. Its sharpening seems to do something rather subtle that enhances the photo, to my eye. It is worth pointing out that any digital manipulation leads to a technical loss of information, but our eyes don’t see information, they see details and patterns, light and shade, and an enhancement that may technically discard pixels will in the case of this kind of processing lead to a better image

PureRaw4 removes a lot of the noise from any photograph really well. The basic “camera-lens” corrections for your setup are very useful too and as I said, I just leave them at default, but you might get more out of your photos adjusting the sliders.

At this point, you can export the image processed by PureRaw4 as a faux RAW file in the format known as DNG. This is essentially a generic RAW format that can be opened in many photo editors as if it were an actual RAW file straight out of the camera. This means you can take the denoised image from PureRaw4 and start your usual editing process like you would with a standard RAW from your camera.

My usual approach at this point is simply to open the DNG file in my photo-editor (PaintShop Pro 2022 Ultimate) and let it do the RAW conversion. I might do a highlight retrieval or bump up the brightness at this point, to get a better final photo. PaintShop Pro has inbuilt denoising, but it’s relatively ineffective on the whole and I never use it.

My first processing step in PSP is to crop to the more precise composition I am after for the final image. I might also mirror an image of an animal so that it is facing to the right or flying left to right. Seems to be a better view of any creature to my eye unless there’s a good reason not to. DxO has a decent photo editor of its own, which I’ve not tested much. It and PSP and many of the other editors, let you adjust various parameters: Overall brightness, shadows, and highlights, saturation, vibrancy etc. You might also fix white balance if there’s a colour cast. Tools that do a “fill highlight” or boost “clarity” are quite useful too.

Fundamentally, the best approach to any adjustment is to push the sliders or percentages to the level where it looks too obvious that you’ve made a change, and it becomes brash or problematic and then draw them back down a notch or two so that the effect is still there but is much more subtle. The key is to process without making the photo look too painterly. I’d say that if you’re pushing anything beyond about 12%, then it might be time to abandon the photo unless it’s a precious one-off or record shot, and you don’t mind a bit of the painterly effect for the sake of having the shot rather than not.

Now that’s all done I might deal with distractions and use cloning or scratch removal tools to get rid of stray stems of grass and other things. Magic Fill in PSP does wonders for removing distractions and unwanted elements in a photo. It also helps if you’ve done a crop-rotate and ended up with empty triangles at each corner of your photo. Simply select the triangle and apply a Magic Fill and the space will be filled smartly with neighbouring texture, works great with background foliage, water, sky etc.

Once all that’s done, my final step is usually to resize the image for a particular purpose. For sharing on social media, I always resize to a pixel width of 2048, and save as a JPEG with 90% compression. This leads to less compression server side. Then I might apply a moderate “unsharp mask” to make the final image a little bit crisper, but also remembering my 12% rule. I then add my dB/ logo if the image is not destined for a client who requests images without logos or watermarks.

I should add that for denoising I have tried some of the online AI tools and perhaps DxO’s most prominent rival in this area, but they simply cannot compete for removing noise without removing detail. PureRaw4 offers subtle sharpening. If you’re hoping to reduce the effects of motion blur and other such problems in your photos, then you might need to turn to an alternative for that kind of sharpening. That said, I tend to use the DxO denoising and then run it through a (motion) blur-reduction tool.

Denoising with DxO PureRaw4

The kind folks at DxO let me have a copy of the latest version of PureRaw ahead of launch last month and so I’ve been using that to process my RAW photos from my camera for a few weeks now. It does an excellent job of basically knocking out noise to the equivalent of about 3 stops of ISO.

So, if I were shooting birds in flight at dusk and the camera needed an ISO of 6400 to compensate for a short shutter speed, then PureRaw4 is giving me the photo as if I’d shot at ISO 800, which is a lot less noise than one gets at ISO 6400 on a 2/3 frame camera like the Canon R7, especially with my big Sigma lens zoomed in to 600mm across the fens. PureRaw adds a new level of sophistication in terms of the algorithm it uses to denoise your photos when compared to the previous version.

PureRaw4 also adds a nice, but subtle sharpening process to the denoising that does not destroy details nor add artefacts of the kind you often get with the more basic tools in photo editing packages. There are sliders for controlling the denoising process based on luminance or “forced details”, so while it can be an autonomous process you do have some control over how the output is generated.

There are lots of enhancements to the workflow for the software that simplify processing for photographers who have a stack of RAW files to process in a given session. Personally, I usually work with just a single photo at a time, but I can see that if I were running a big photo session that the new workflow would make for a much slicker job.

When you first load a photo into PureRaw4, it identifies the camera and lens combination you used and downloads a package that allows the software to improve lens softness, reduce vignetting and fix other aberrations known for that combination. It saves the information for the next photo, but when you load another photo where you swapped out the lens or used a different camera it will download that appropriate file to fine-tune the output.

Anyway, I’ve been testing this new version of PureRaw for about a month now and all my photographic output in that time including pictures of stork, starling murmurations and those photos of moths that were not focus-stacked, have all benefited considerably from its denoising. Check out shots on the Sciencebase blog as well as my social media.


Not New Year 2024 in Titchwell and Holkham

We didn’t make it to the north Norfolk coast for our usual new year yomp through the area, but we did make it to Titchwell for a couple of nights a month later. We had packed and departed for the coast by mid-afternoon. As we approached our lodgings, it was almost dark, a shadowy Tawny Owl flew across our path. By the time we arrived, it was fully dark and the last of the day’s Brent and Pink-footed Geese were noisily heading to roost.

Shore Lark, one of 14 in a flock at Holkham Gap

Shore Lark, one of 14 in a flock at Holkham Gap

We ate well that evening at Briarfields and the next day we were up reasonably early to see Marsh Harriers quartering the eastern end of RSPB Titchwell, we could easily see them from our breakfast table. There were at least four showing and one flew almost directly over to the hotel’s outdoor area.

Curlew after dawn at Briarfields, Titchwell
Curlew after dawn, Titchwell

The next breakfast there were no Marsh Harriers, but there were plenty of Curlew flying across the fields neighbouring the hotel’s grounds.

Mute Swan coming into land, Titchwell

Anyway, back to Thursday, we kitted up and took the 20-minute walk to the nature reserve entrance. Turns out the connecting footpath from the hotel is only open four weeks of the year, in the autumn, when there is no bird breeding activity. Also turns out that if you try to head for the beach and walk back along to RSPB Titchwell, you are stymied in your quest by an impassible running channel. So, the road it was.

Snipe and prey, Titchwell. One of several visible on the edge of Patsy's Reedbed
Snipe and prey, Titchwell. One of several visible on the edge of Patsy’s Reedbed

A solitary Reeves’s Muntjac deer was picking up scraps beneath the bird feeders when we arrived, there were also Brambling around, although we didn’t see one until we were leaving.

Reeves's muntjac
Reeves’s muntjac – not a bird

We got wind that there was a Tawny Owl roosting in an ivy-covered tree, so we followed the boardwalk to see if we could spot it. Mrs Sciencebase, as ever, was first to catch a tiny glimpse of feathers through the ivy. The bird was very well hidden, you wouldn’t have known it was there without someone having heard it calling or seeing it come to roost to point out the precise tree.

Oystercatcher on Titchwell beach

We then trekked down to the beach. It was chilly, but the wind was not strong. Usual suspects on the water’s edge: Oystercatcher, gulls, Sanderlings skittering back and forth at the periphery of the tide, Dunlin, A couple of Bar-tailed Godwit.

Male Brambling at Titchwell
Another winter visitor – Brambling (M) sometimes known as the Mountain Finch or the Cock o’ the North, a cousin of the Chaffinch

Out to sea, we missed the Long-tailed Duck and the Red-breasted Merganser, but could see hundreds of Common Scoter. These are pretty much indistinguishable from the Black and Velvet species, unless they’re in flight, when you might, with a decent eye, and a decent scope, have something of a chance of distinguishing one from the others.

Flock of Golden Plover at Titchwell
Golden Plover coming in to land
Golden Plover coming into land

Back on the reserve, a couple of Curlew were displaying some intriguing behaviour. It was impossible to know what they were doing. One seemed to be slightly more aggressive than the other and would approach and the other would back away. Then the pair would hop onto a muddy overhang with stems of some kind of plant in their bills and peck about as if they were musing on the possibility of making a nest. Although I don’t think this would have been a good site for them.

Grey Plover at Titchwell, one of several
One of several Grey Plover on our recent visit to RSPB Titchwell

We’ve still no idea if this was two males attempting to territorialise or a male and a female attempting to pair bond, or perhaps even two females. Maybe it was mother and daughter, with the former teaching the latter. That said they were pretty much the same size, so that seems a little unlikely.

Titchwell Teal
Titchwell Teal

Later, we saw another Curlew giving short shrift to a Redshank that was attempting to feed on the same patch of scrubby mud poking out of the water of the mere.

Curlew seeing off a Redshank
Curlew seeing off a Redshank, Titchwell
Curlew having seen off the Redshank

The next day was travelling home day but we decided, after a double-back to visit the nature reserve at Holkham Gap. There are usually Shore Lark to be seen here in the winter and Snow Bunting. We trudged about in the wind and saw lots of birders but none of the birds. There were again hundreds of Scoter out to sea.

Ruff at Holkham
Ruff at Holkham

We got wind of the Shore Lark, about 14, apparently at the most westerly point of the Holkham Gap and so headed in that direction. There were several birders with scopes heading in that direction. So, we felt like we were on a promise. A couple heading home confirmed that the Shore Lark were about half a mile further along the beach, where we could see two other birders watching them.

A tiny fraction of the flock of Pink-footed Geese at Holkham. There were several thousand.
A tiny fraction of the flock of Pink-footed Geese at Holkham

We set off towards the birds but could see dogwalkers arrive with a lively pup. The inevitable happened and the dog ran through the distant patch where the Shore Lark were feeding sending them in their little flock back towards us at great speed. They landed not 60 metres from where we stood, which was a spot of luck, you might say, and the closest views we have had of these charming winter visitors from the distant north.

One of three Little Grebe on the pond at Holkham on Friday
One of three Little Grebe (Dabchicks) on the pond at Holkham
Maintenance at the nature reserve, RSPB Titchwell
Maintenance at the nature reserve, RSPB Titchwell – not birds

Filling the frame – some tips on wildlife photography

I see a lot of wildlife photography from both amateurs and professionals. At the highest level in both domains, there are perfectly composed, pin-sharp, exquisitely exposed photos of the natural world, and then there are those that aren’t quite up to snuff.

Capturing the beauty of nature can be an exhilarating experience, but even the most enthusiastic amateur photographers can run into common pitfalls that hinder the impact of their shots. Here a few key challenges faced by us all at different stages in our photography:

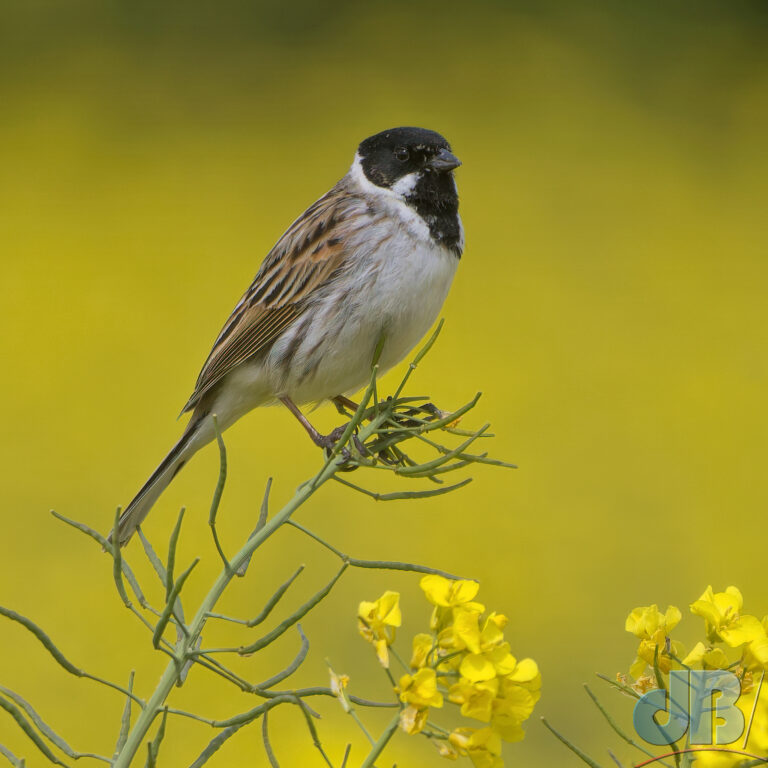
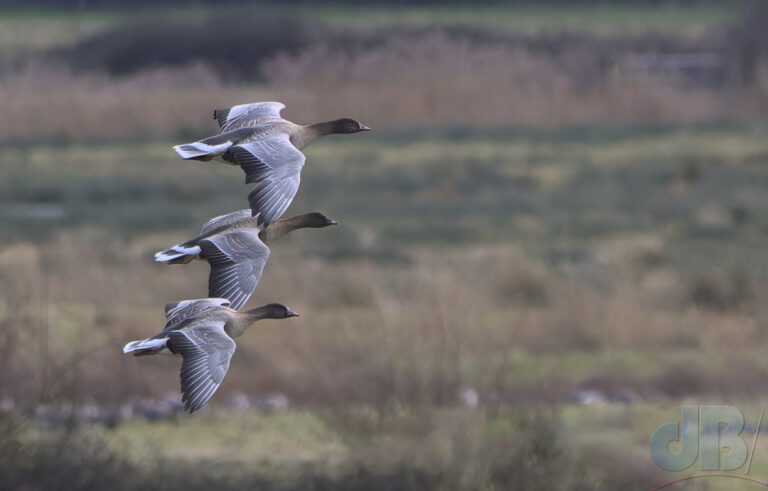
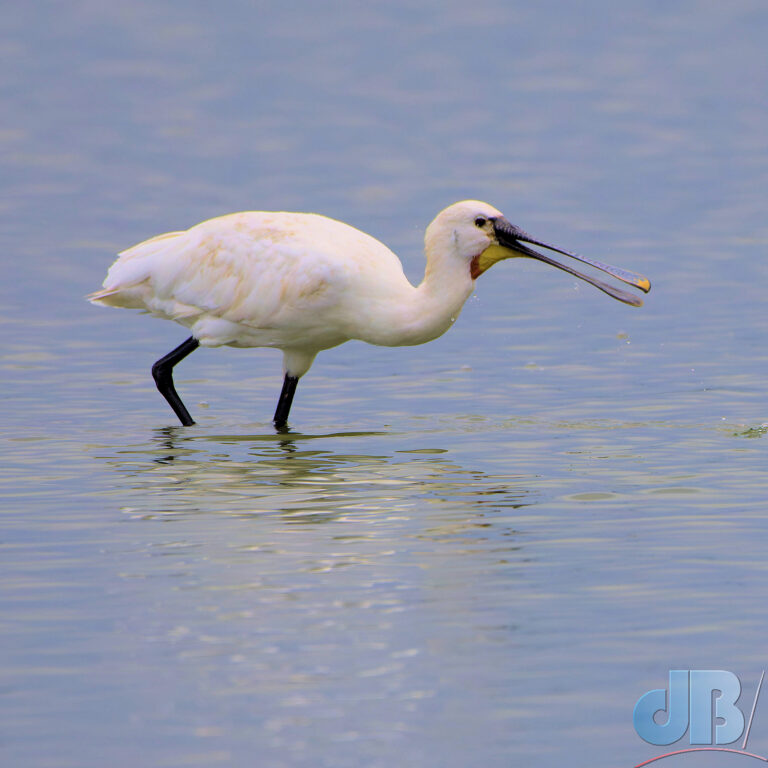
Put Nature First: The most important point to make is that your photography should not have a negative impact on the nature you photograph. Keep your distance, do not disturb, do not interfere. But, fill the frame if you can either through judicious lens choice or by photographing from a hide on a nature reserve, for instance.

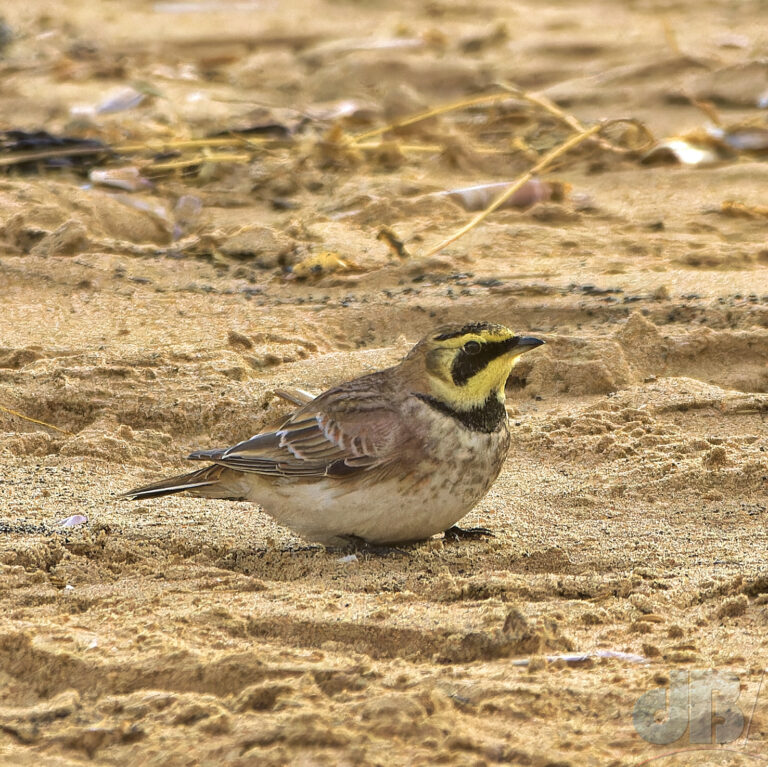
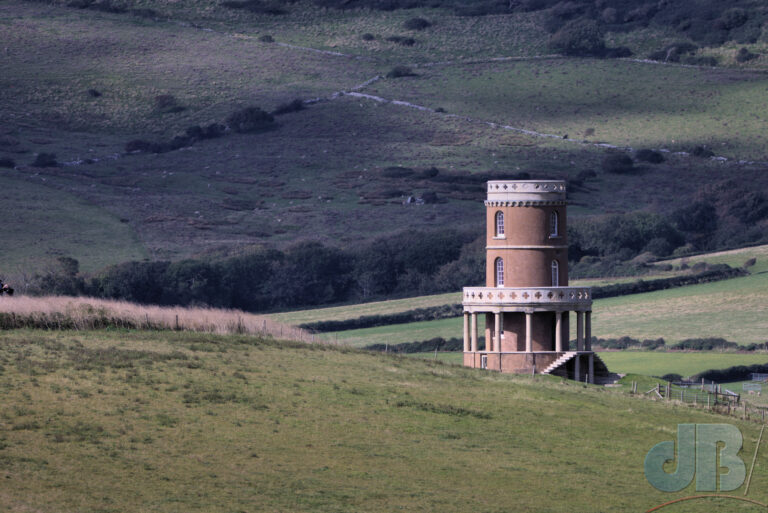
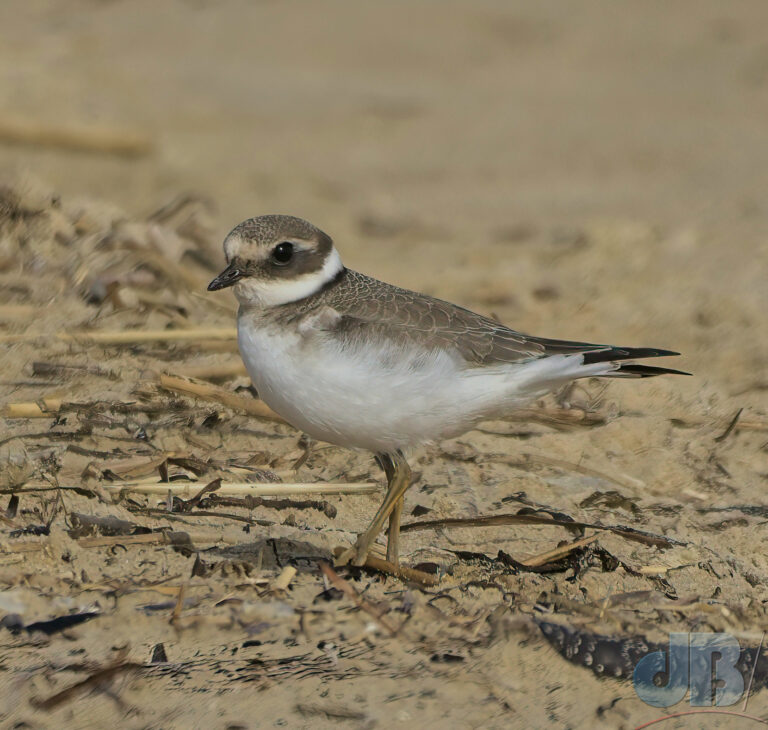
Compose Thoughtfully: Some nature photos lack a deliberate composition, leaving viewers unsure where to focus their attention. Before hitting the shutter button, take a moment to consider the background and overall framing. Ensure that your subject is positioned thoughtfully within the frame, creating a visually compelling image. Make sure you’re not cropping the bird’s wingtip or feet or the top of those protuberant petals unless you’re doing it on purpose for dramatic effect. Fill the frame as best you can but crop and re-compose to your personal taste, if necessary, when processing.

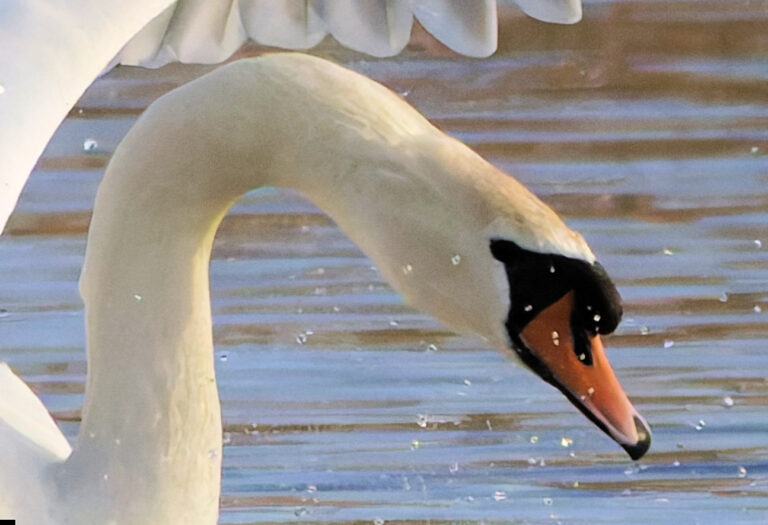
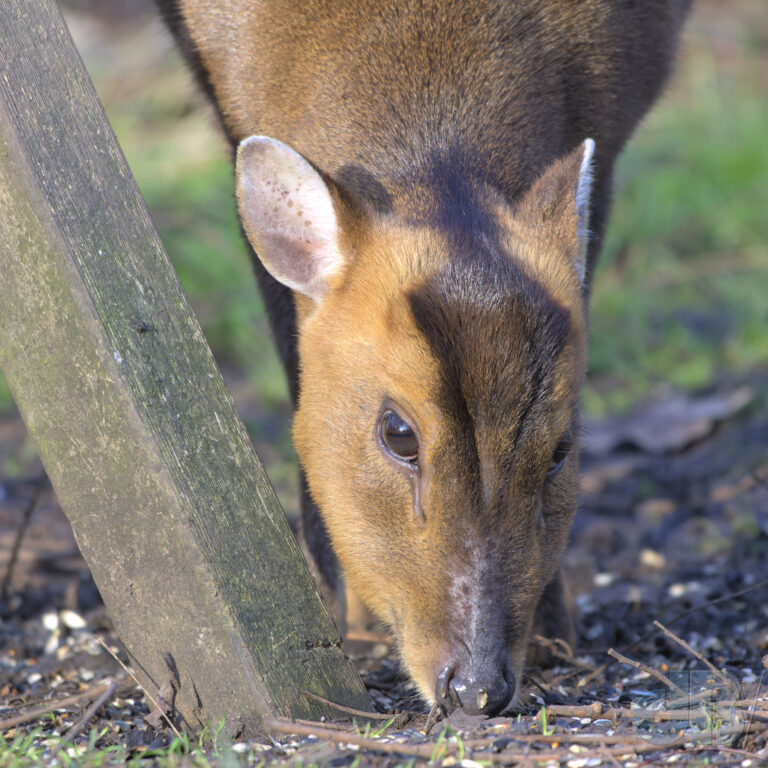
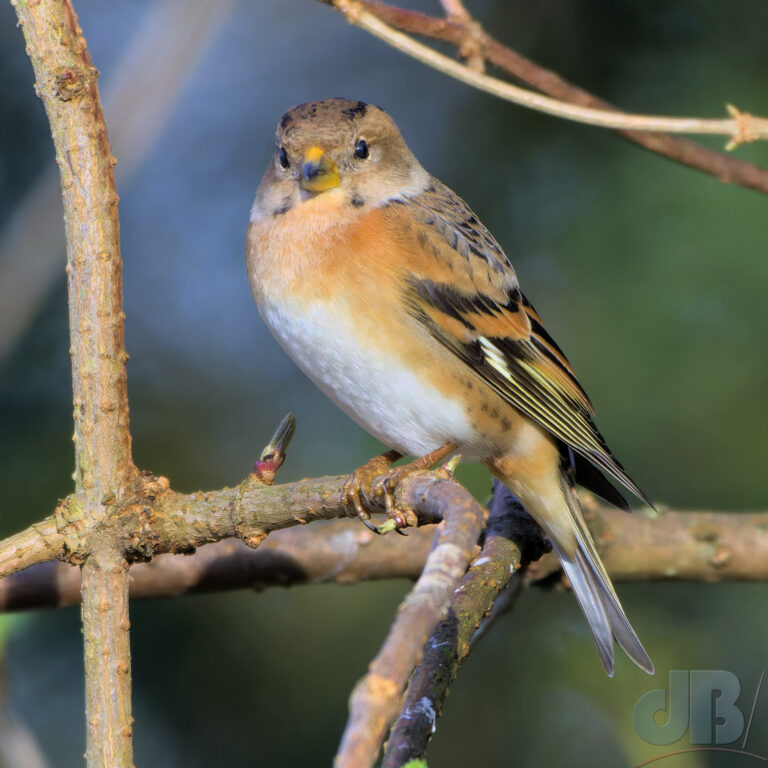
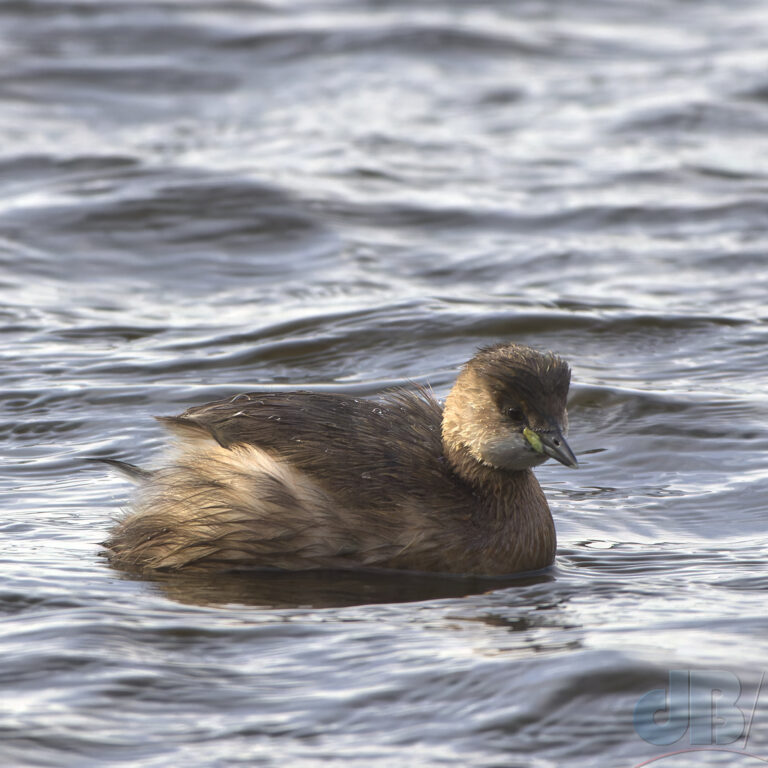
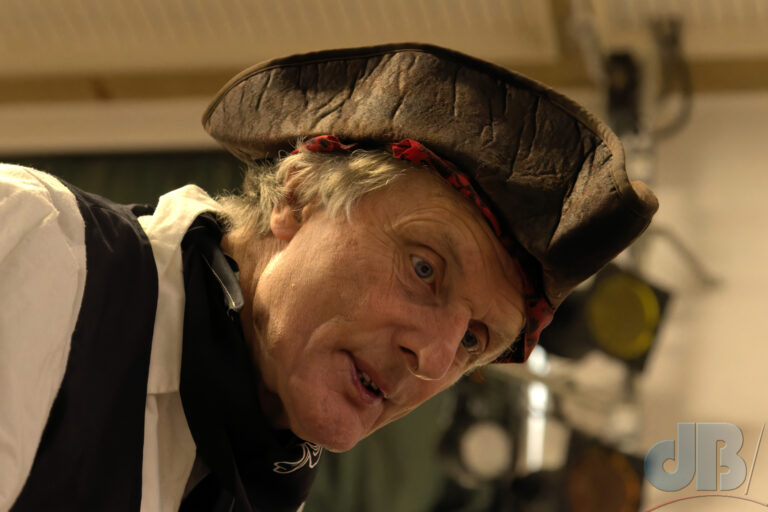
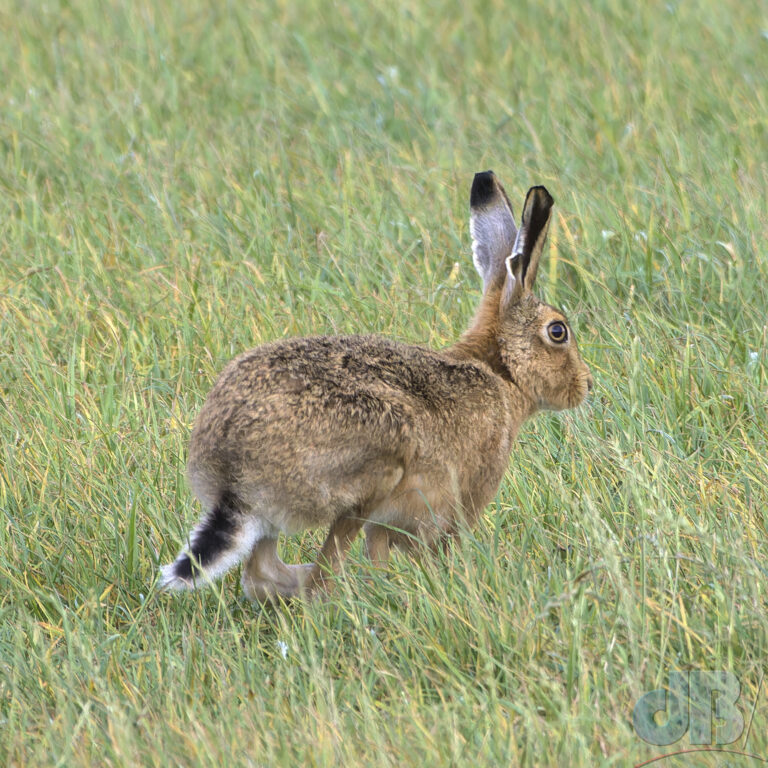
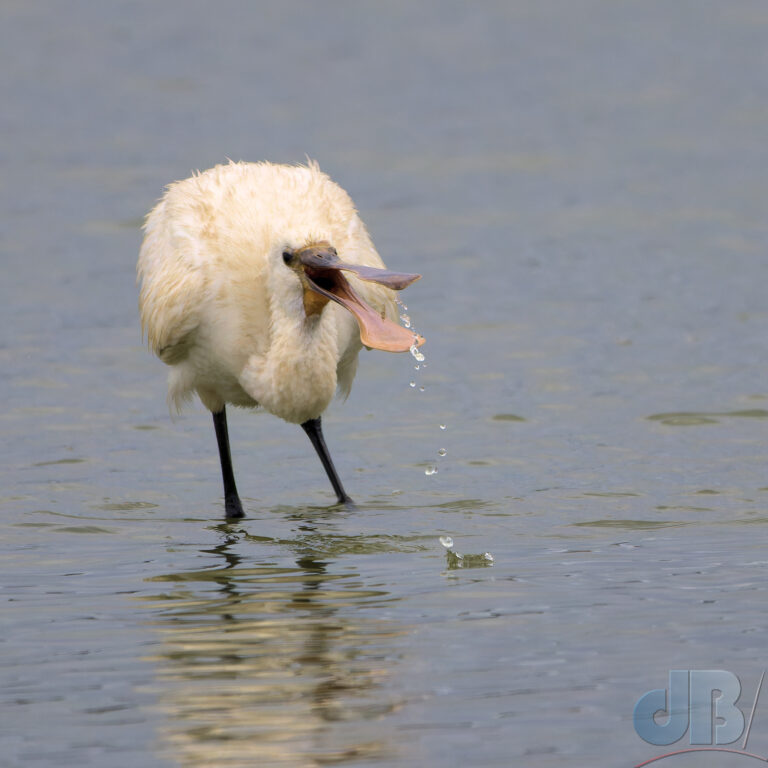
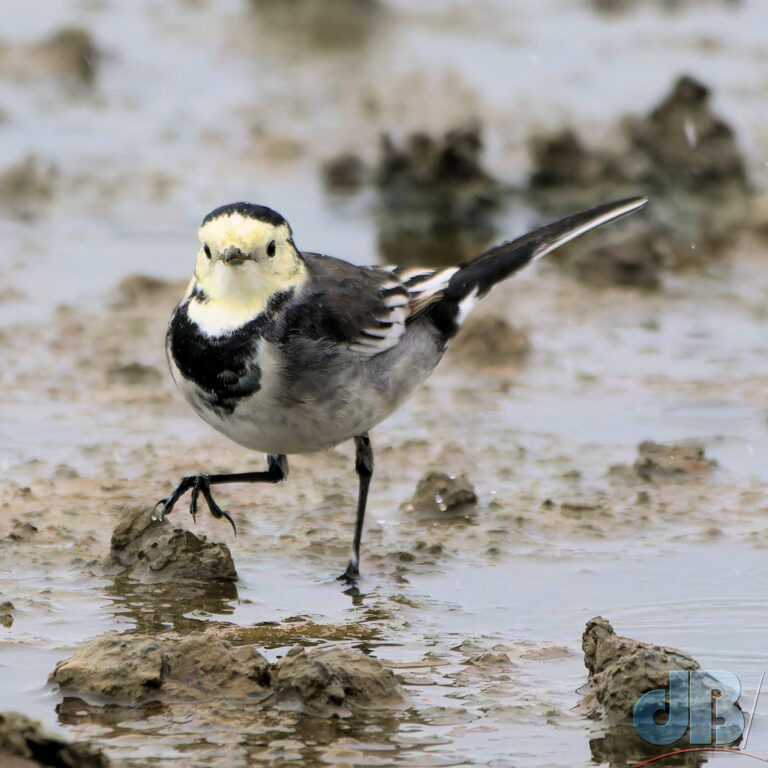
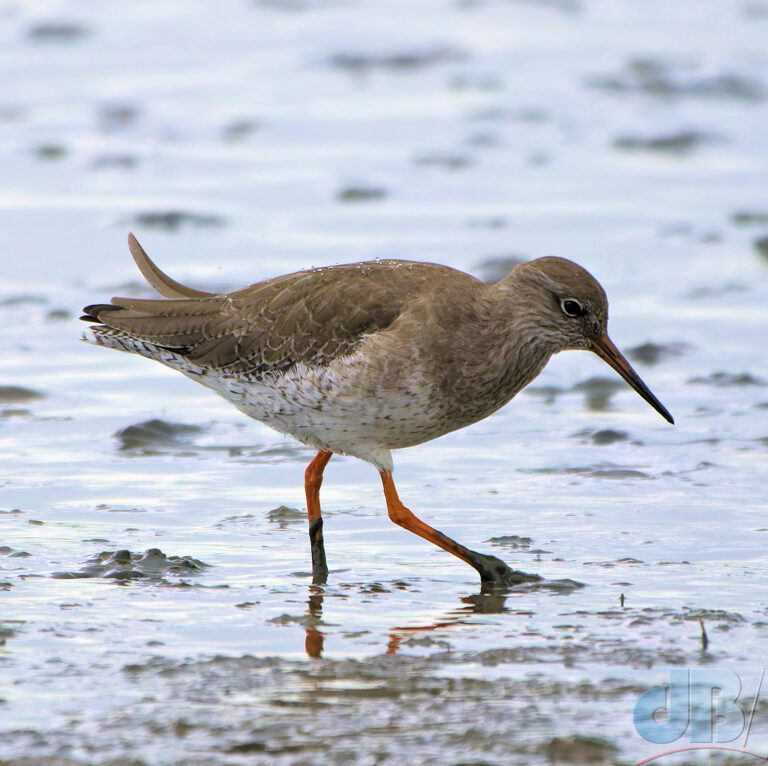
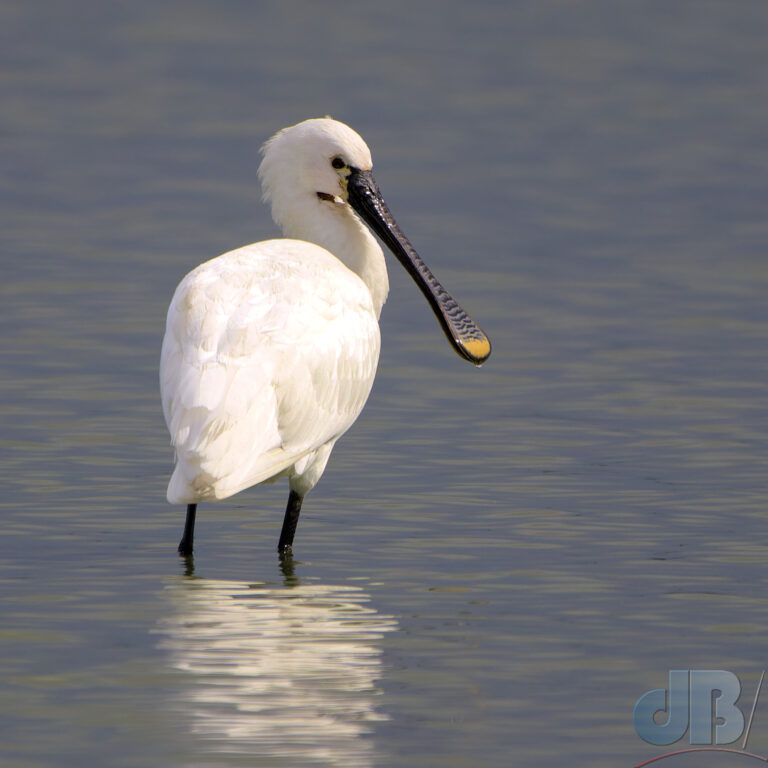
Focus on the Essentials: Ever captured a photo where the main subject is out of focus, or attention is drawn to irrelevant details? Make it a priority to focus on the nearest eye of your subject or the key point of interest, whether it’s the whole subject or the food in its claws. This simple adjustment can transform an everyday-type shot into a captivating one.

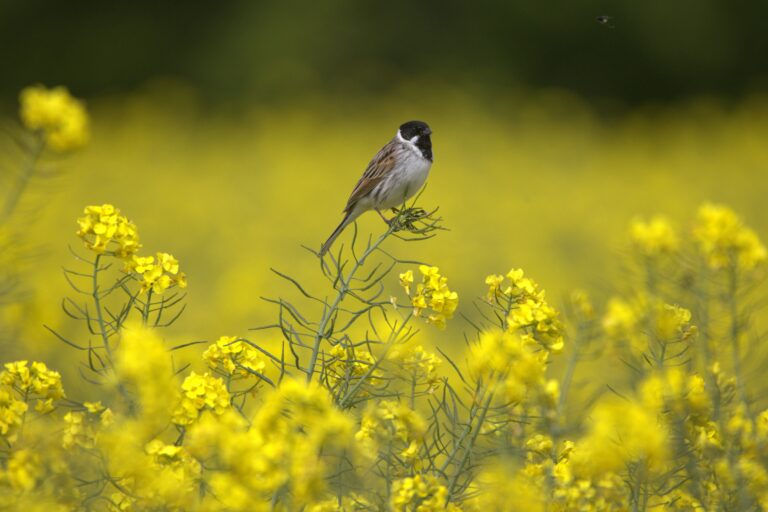
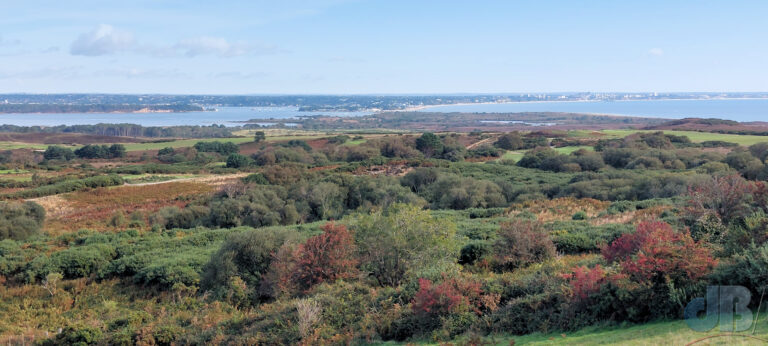
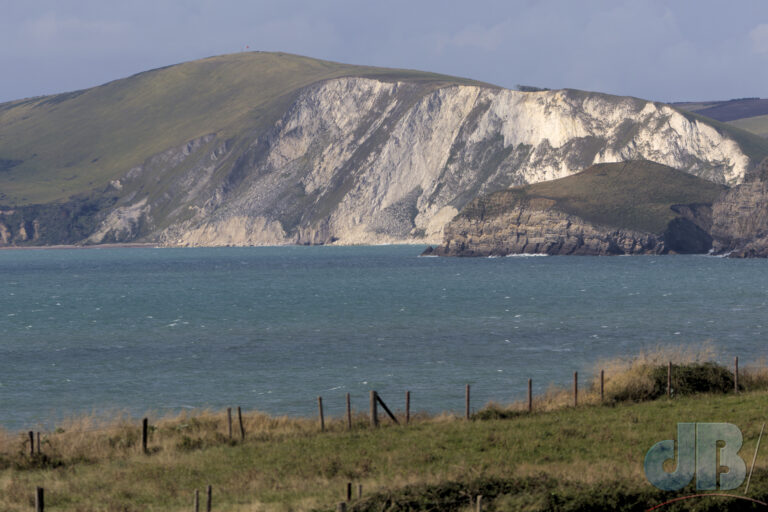
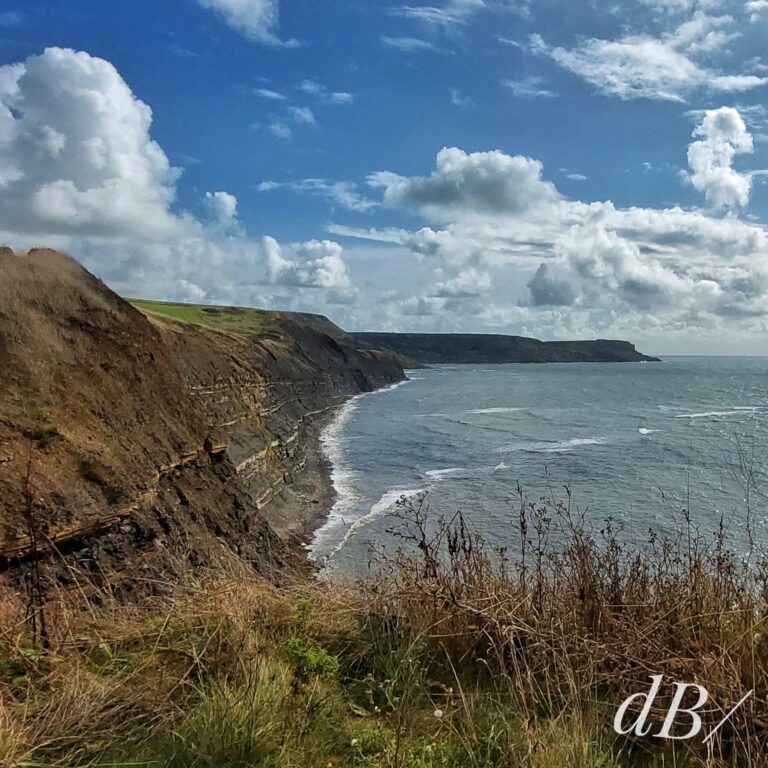
Tame the Foreground: Foreground clutter can diminish the impact of your nature photos. Find a position or elevation where distracting elements that obstruct the view of your subject are no longer a problem, allowing it to take centre stage. A clean foreground not only enhances the aesthetic appeal but also guides the viewer’s gaze to the main attraction. Of course, foreground detail can be used to lead the viewer to the subject if one is combining landscape-type photography with the subject.

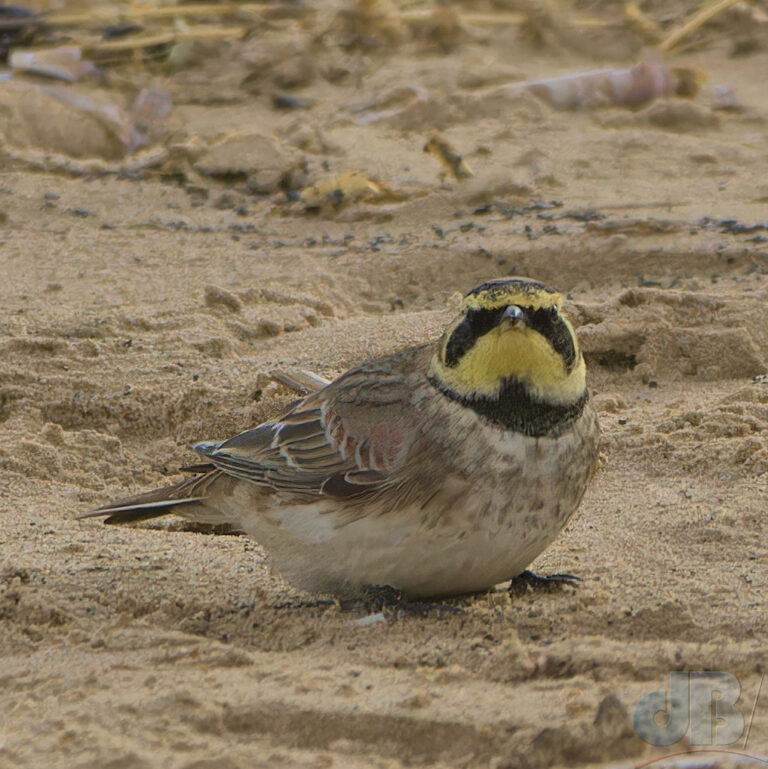
Make Eye Contact: Engage your audience by capturing your subject with compelling eye contact. Avoid shots where the animal looks away from the camera, unless it adds a unique and interesting element to the narrative. The eyes lead use to the animal’s character, so they usually need to be a focal point in the composition.

Master Your Camera: Learn as much as you can about manual mode for your camera, choose it over auto modes. That said, Aperture Priority or Shutter Priority can give great results and reduce the workload when out in the field by narrowing your choices slightly.

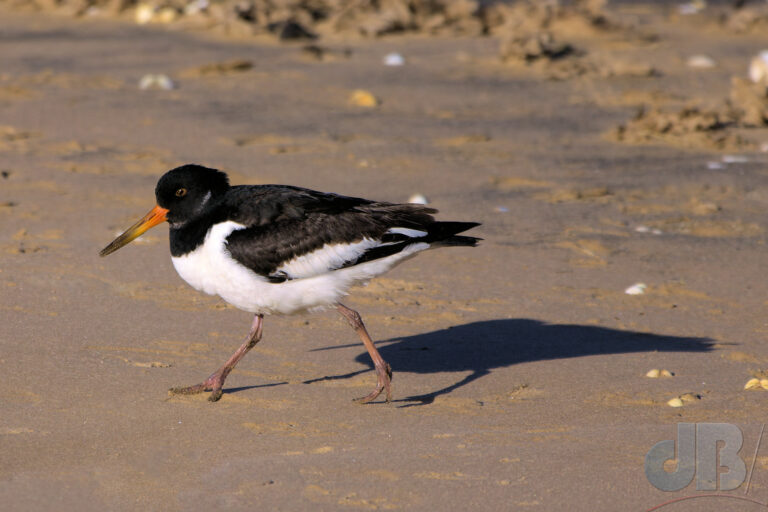
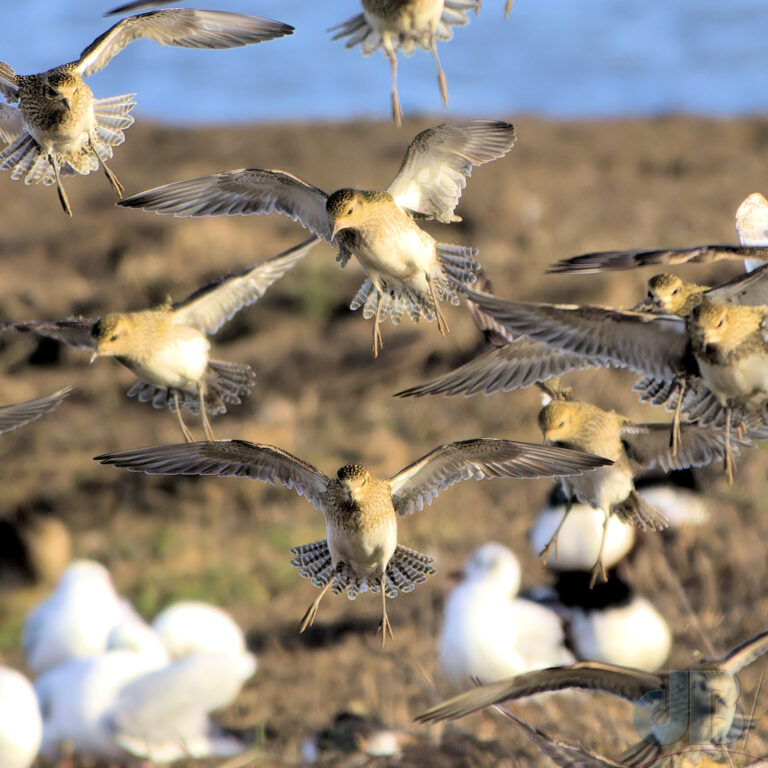
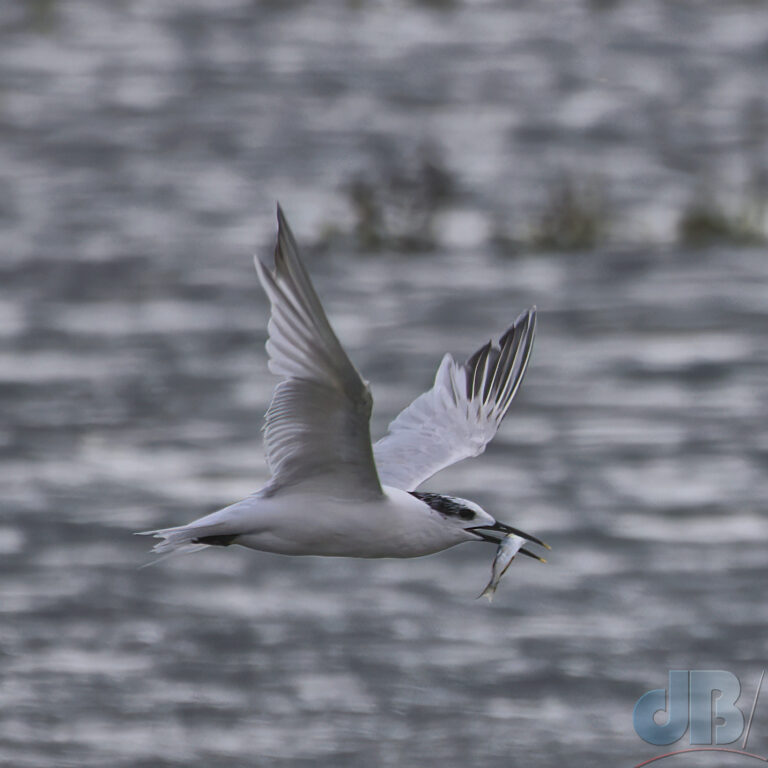
Choose Settings Wisely: Carefully select your camera settings to ensure optimal results, especially when photographing moving subjects. Avoid the frustration of blurred images caused by a slow shutter speed. Experiment with settings to strike the right balance, ensuring your subjects are crisp and clear. Achieve the right depth of field by choosing your aperture carefully to control the focus zone, preventing subjects from being too blurry or the background too distracting. Use focus stacking when doing macro closeups if you can, it will give you more sharpness throughout the image. Whatever you do, strive for a good balance that allows your subject to stand out against a pleasing backdrop.

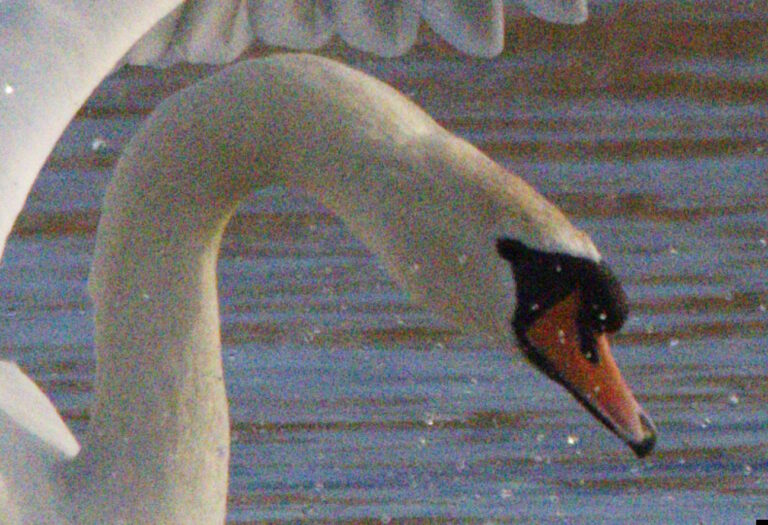
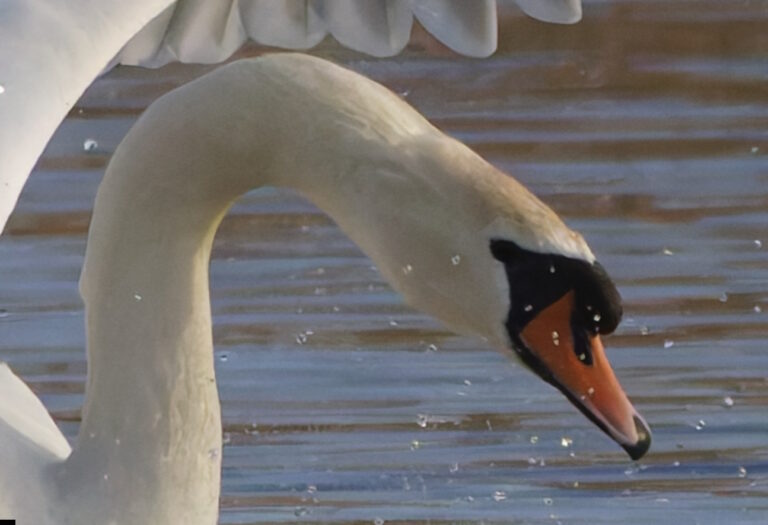
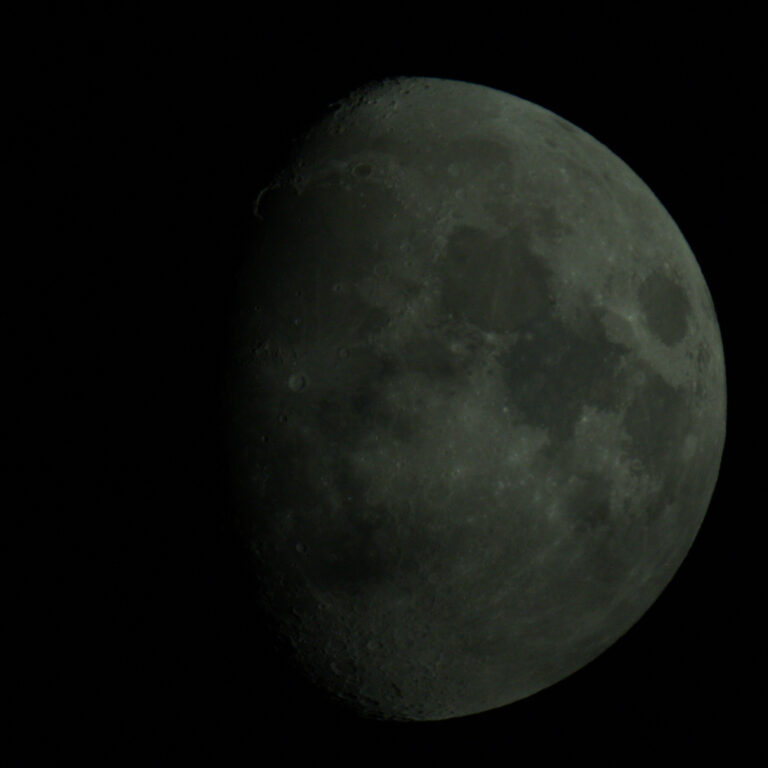
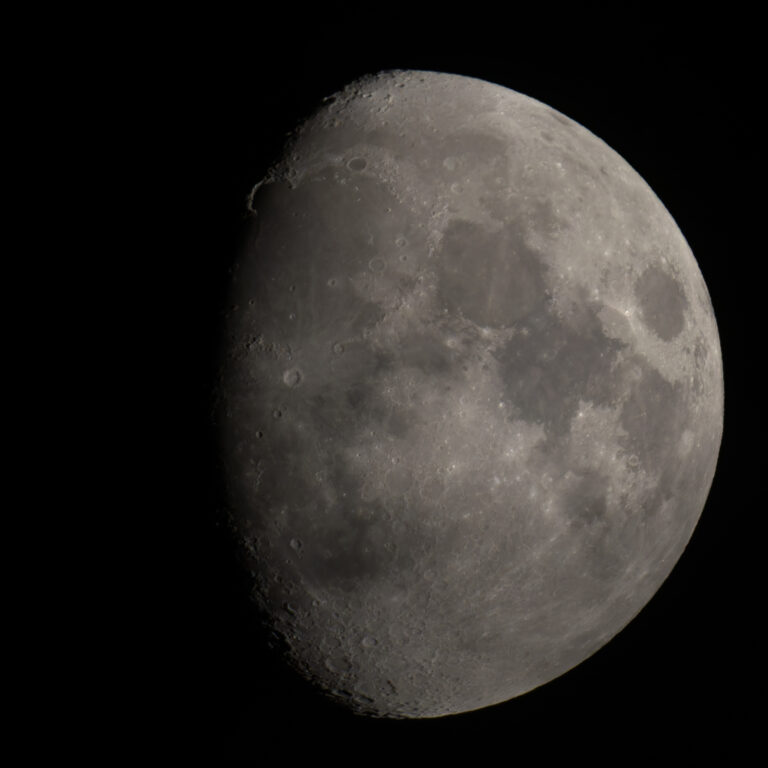
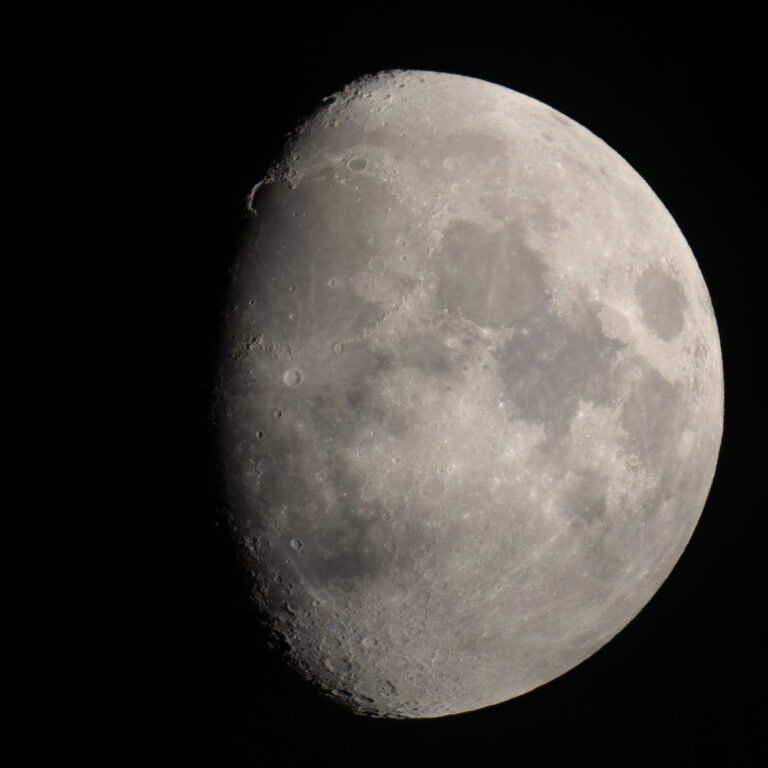
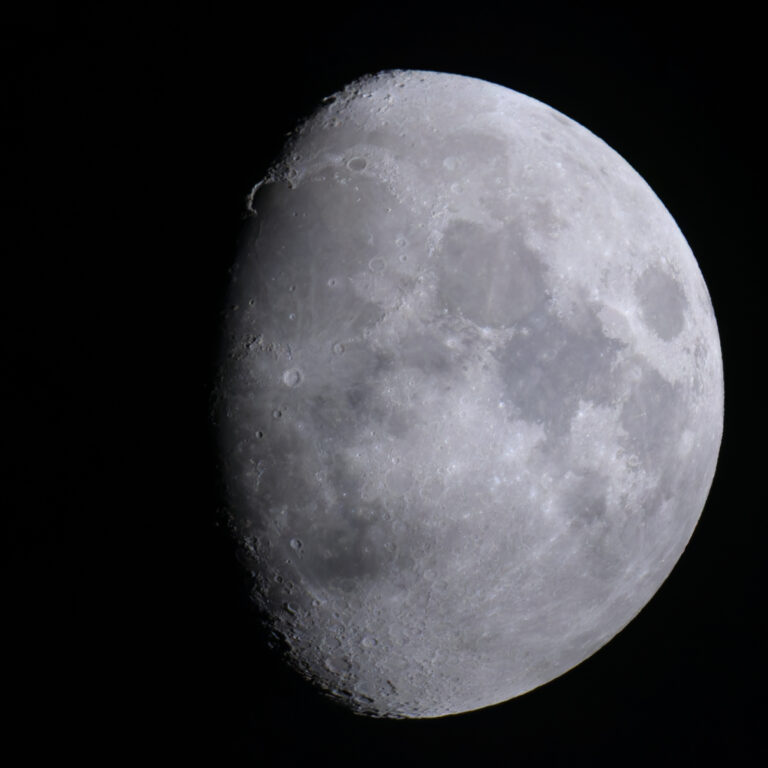
Conquer the Dark: Low light conditions can result in noisy photos, usually because the ISO has to be high to avoid too long a shutter speed or because you’re aperture is as wide as it can go and still not enough light is reaching the sensor. A tripod can assist and image stabilisation. But, often to overcome noise you need a tool such as Topaz Denoise AI, DxO PureRaw, or Lightroom, all of which can preserve the quality of your image while reducing the noise by the equivalent of several stops of ISO.

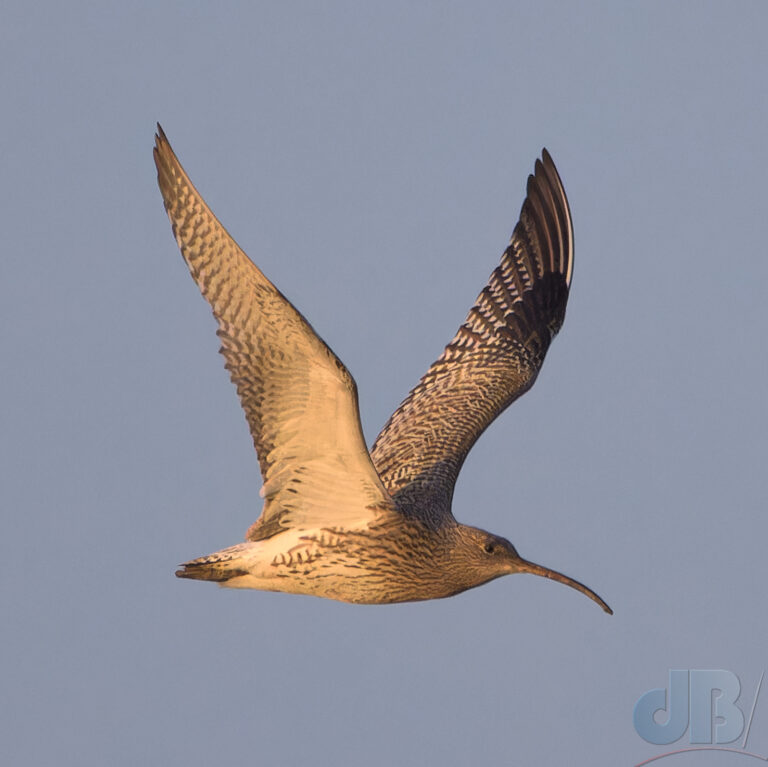
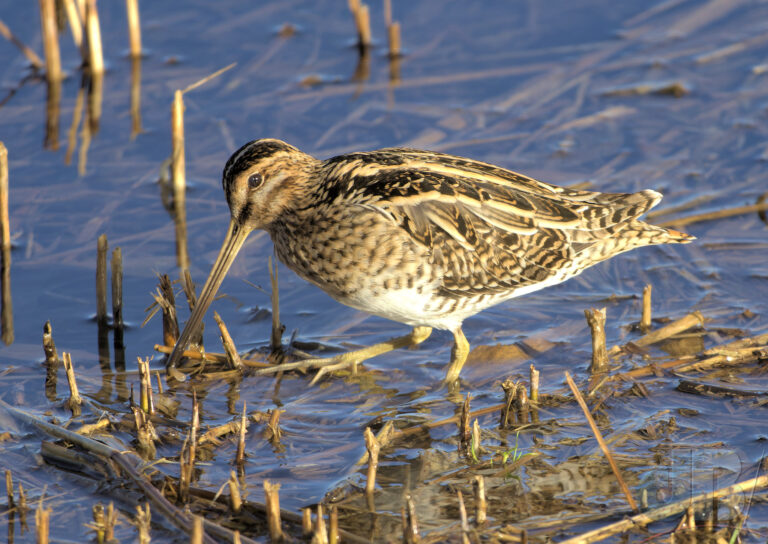
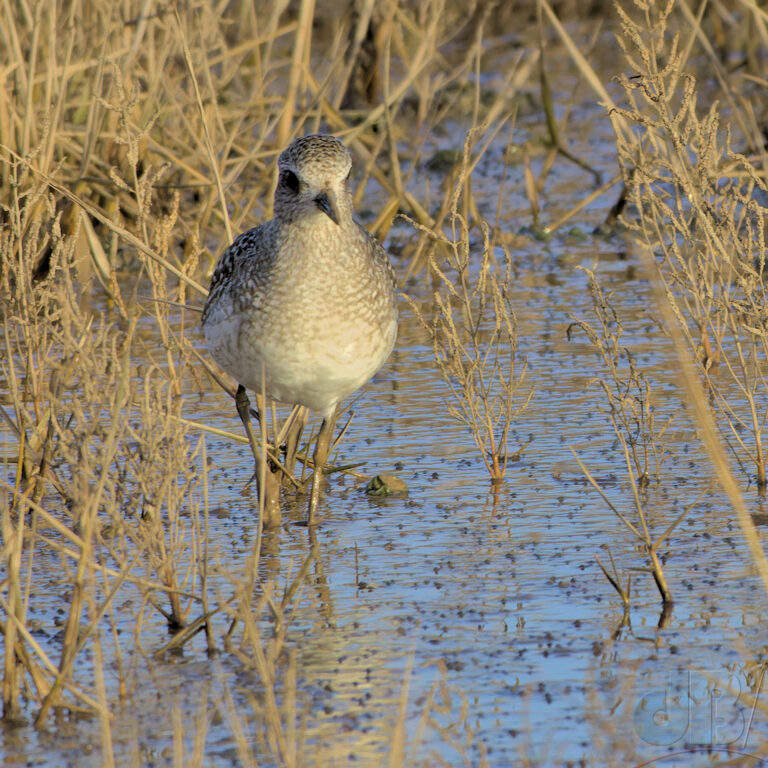
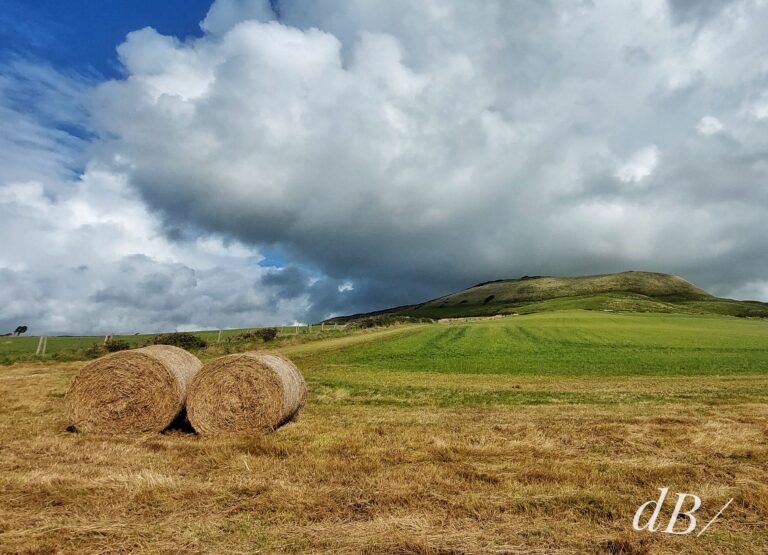
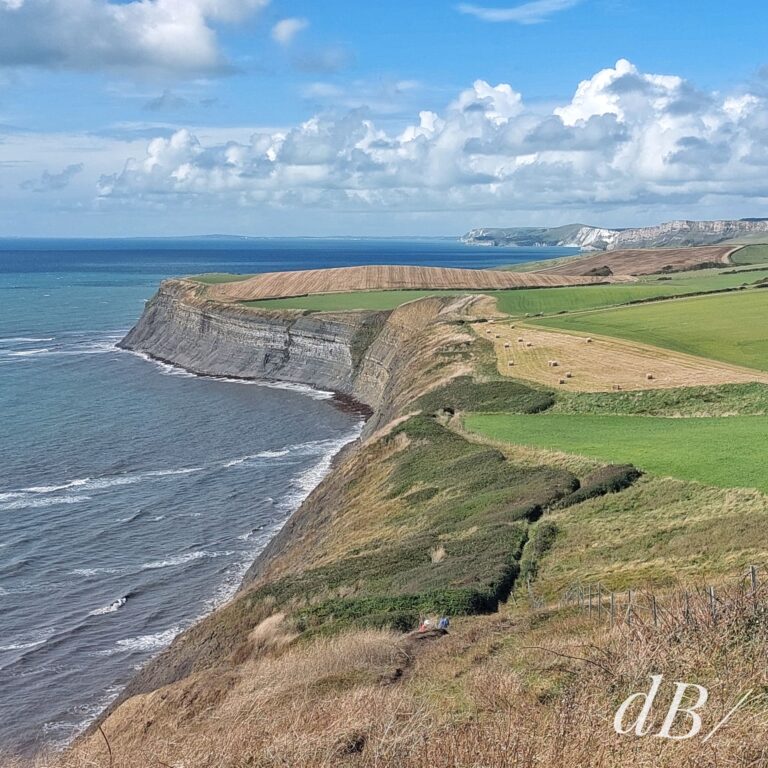
Chase the Golden Hour: Early morning or late evening – when natural light transforms your surroundings. Soft, warm hues can add a mesmerizing touch to your photos. Pay attention to the direction and quality of light, allowing it to enhance the texture and details of your subjects.

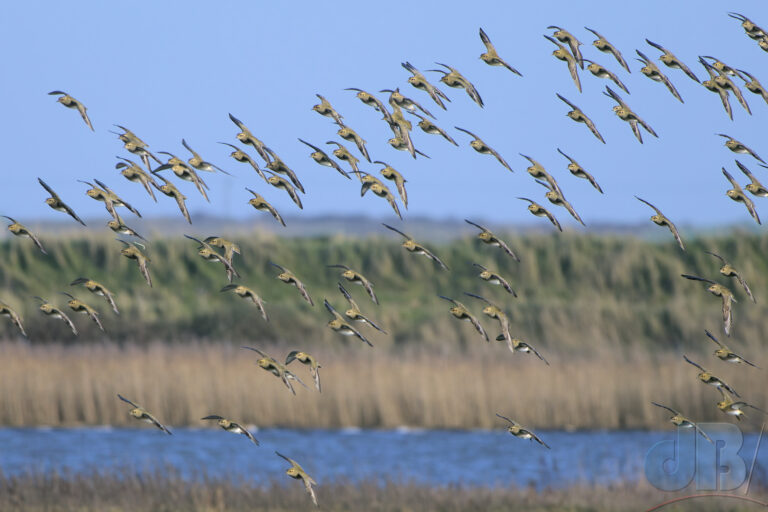
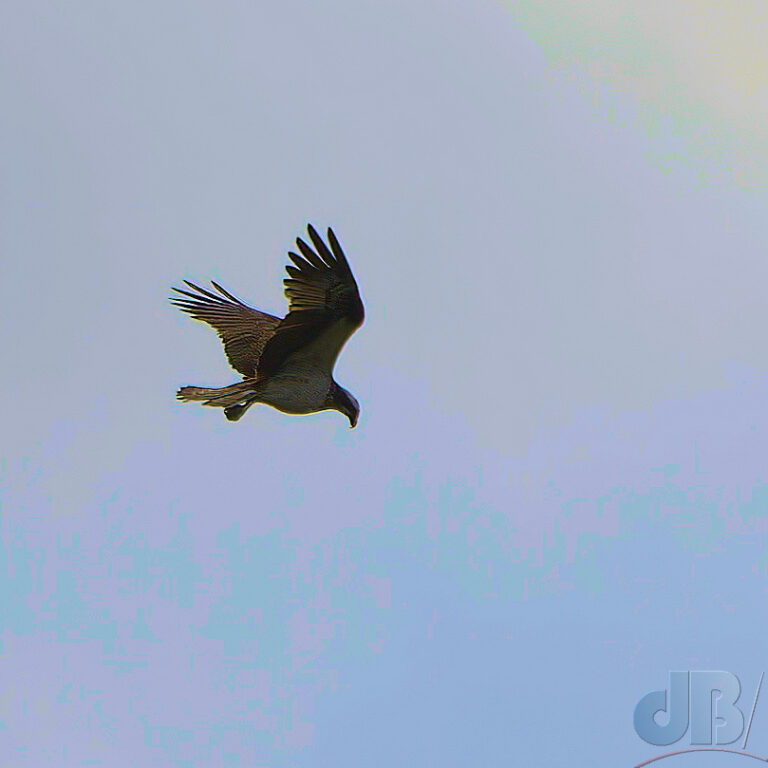
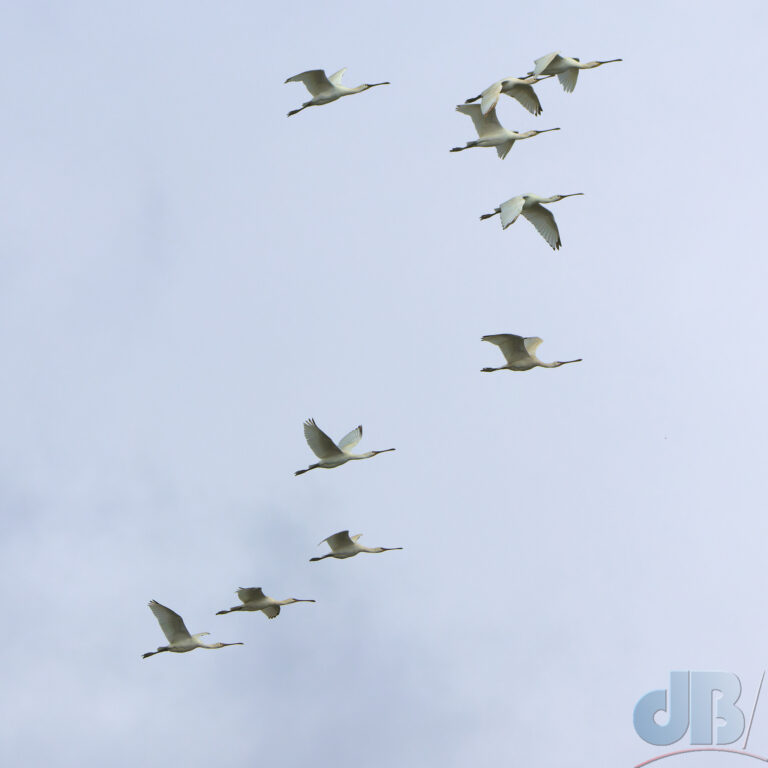
Be Patient: Nature is unpredictable, and some of the most captivating moments unfold when you least expect them. Exercise patience and be prepared to wait for the perfect shot. Whether it’s a bird taking flight or a playful interaction between animals, the payoff is often worth the time invested.

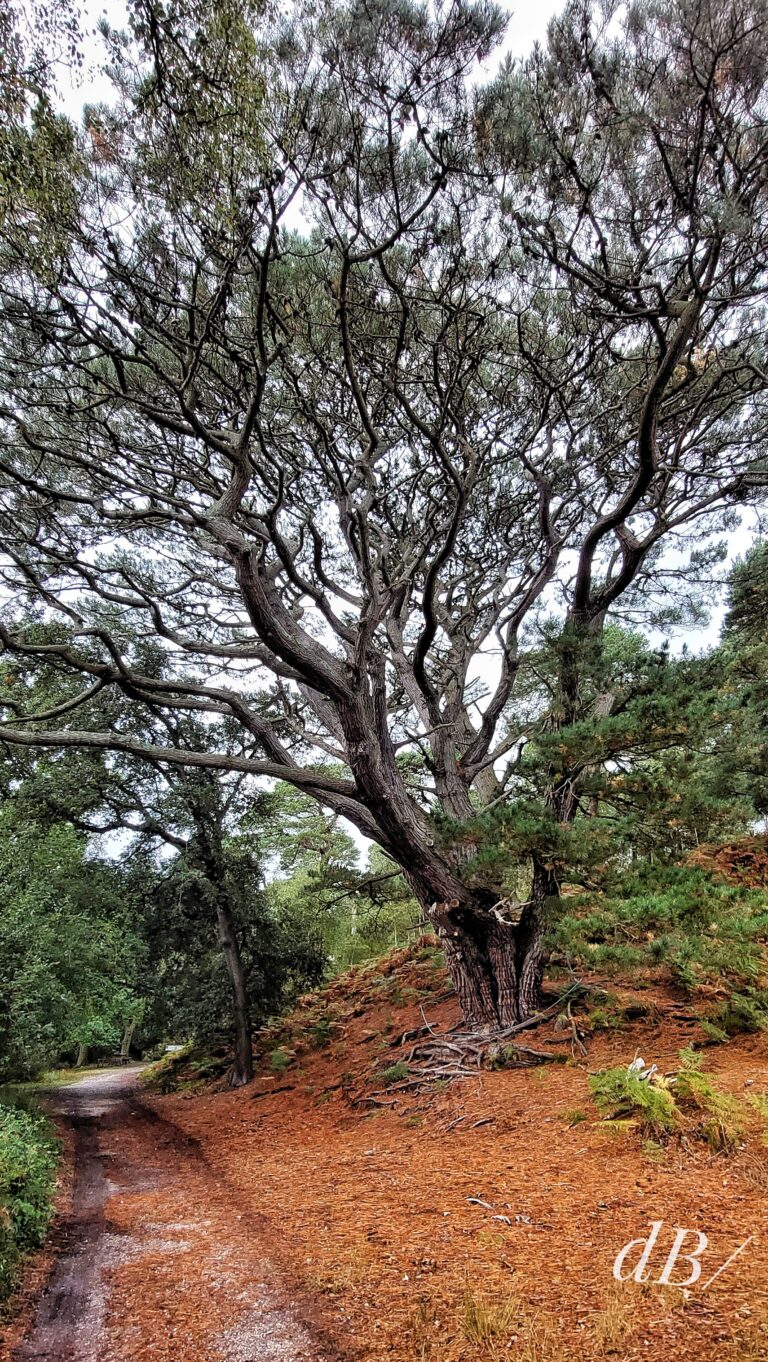
Utilize Leading Lines: Incorporate leading lines into your compositions to guide the viewer’s gaze through the frame. Natural elements like rivers, paths, or branches can serve as effective leading lines, adding depth and visual interest to your photos. This perhaps applies more to landscape type shots, like the classic stag atop a mountain in the dawn mist with the winding trail leading towards him.

Make a Silhouette: Experiment with silhouette photography during sunrise or sunset. Position yourself so that your subject is against a bright background to create striking, shadowed view. Silhouettes can evoke powerful emotions and add a touch of drama to your nature shots.

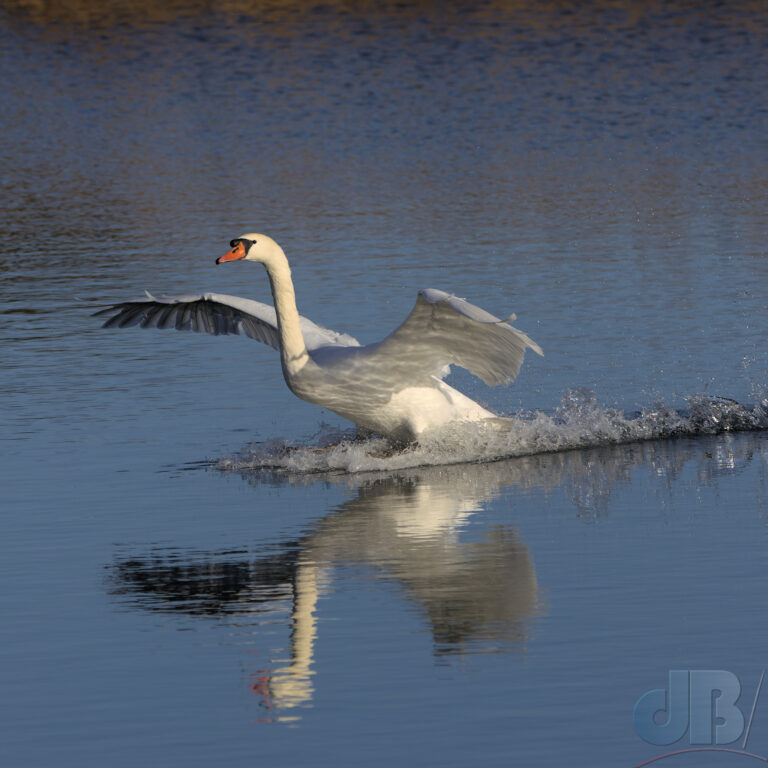
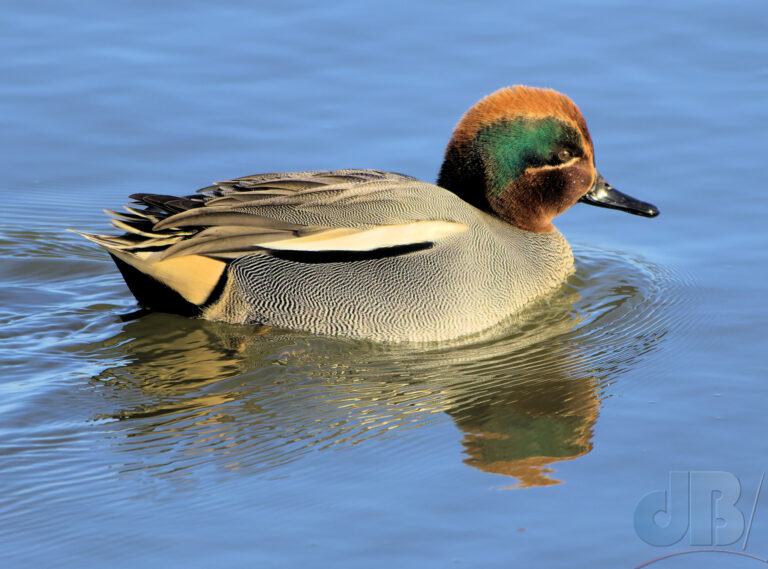
Reflect On It: Bodies of water offer fantastic opportunities for reflection shots. Capture the symmetry of the landscape and wildlife by positioning yourself strategically to utilize the reflective surface. This technique can result in stunning, ethereal images.

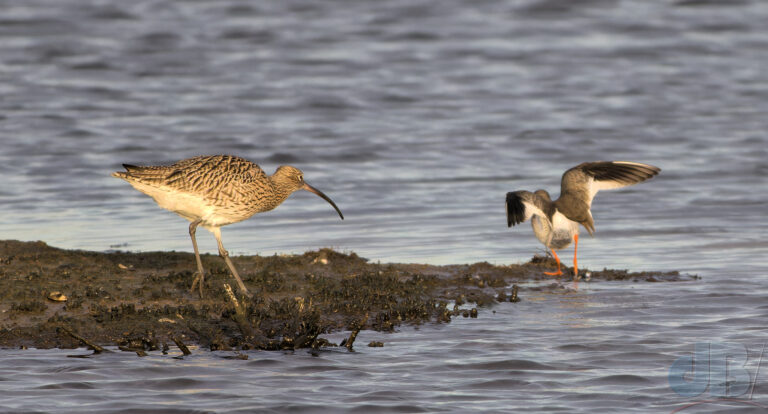
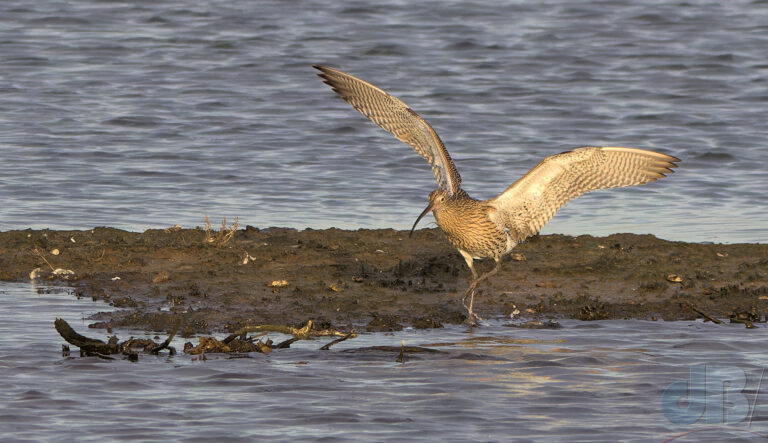
Tell a Story: The most engaging photography tells a story. An individual frame can do it But, instead of always relying on one isolated shot, consider making a sequence of images. Capture the progression of events or the behaviour of animals, providing viewers with a more immersive experience.

Develop Your Photos: Ever since photography’s beginnings, processing the detail that the camera captures has been an essential part of the process whether it was developing the film, enlarging negatives in the dark room or downloading the RAW files to work on them with a computer. Pressing the shutter is just the first step. Embrace the power of post-processing to refine your images.

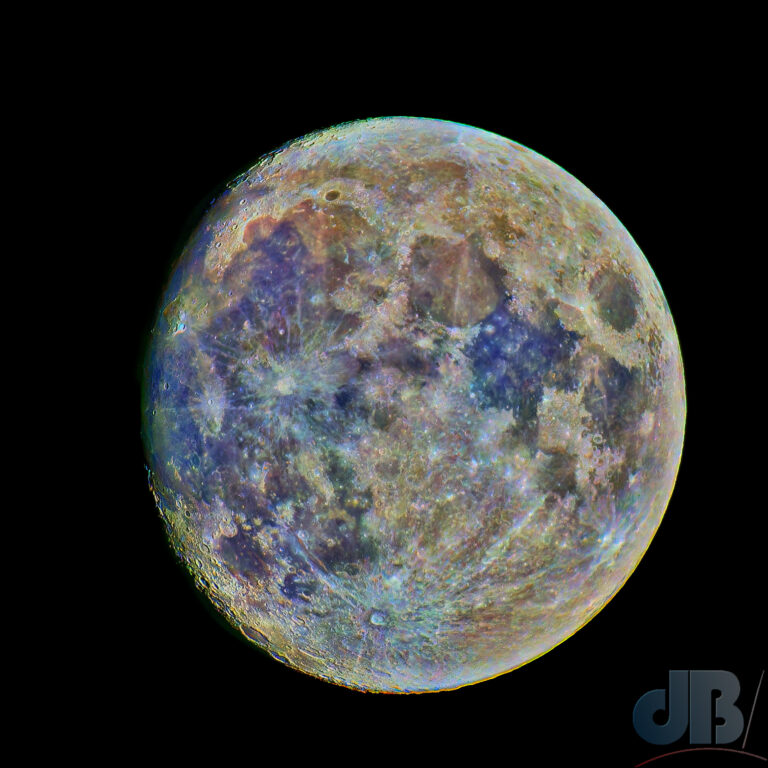
Get Back to Basics then Advanced Mode: Learn the basics and the advanced options for your photo software to enhance the image you captured with your camera. There are no rules, you can be as subtle or as extreme in how you adjust your saturation/vibrancy, exposure, white balance, contrast, sharpness, and other characteristics of your photo. Many people say that moderation is key, but that’s a personal choice, moderation can be naturalistic, but extreme processing can be just as vivid and engaging. Your choice.

Shoot RAW: A couple of extra tips.

Memory cards are cheap as chips these days, buy plenty and put spares in your camera bag or strap pocket etc.

Always shoot in your camera’s RAW mode if that’s available.

Make sure you take charged spare batteries with you, especially if you’re using burst mode a lot on a long day’s safari or you use the camera’s monitor for live view type shooting. And, especially, if it’s cold weather (batteries run down quicker when they’re cold).

Download your photos after each session using a tool that allows you to name the files/folders usefully for cataloguing. Back them all up. Then do your selection and processing. Storage is so cheap it’s better to save everything initially and work on the ones you like rather than deleting on-the-fly and then regretting a deletion of the only shot you got of the elephant in the room, for instance.

Remember, the subject is more important than your photo of it. Respect nature, the wildlife, the environment. Follow any protective local regulations.

Leave no trace and take only great photos!

Peter Panto 2023 – Cottenham Theatre Workshop

My annual view from the pit as guitarist with the band and as “assistant musical director” alongside our proper Musical Director Barbara Duckworth on piano. What a show it’s going to be. We’ll also have Adam out of off of C5 the band on drums, Christian on cello, and Tanara on clarinet.

Anyway, these are my photos of the grownup actors in no particular order. Cottenham Theatre Workshop (CTW) will share my photos of the youngsters in character on their website and socials.

Sleeping Pan

Still some tickets available for the Saturday matinee and early evening show, but those are almost sold out. Reasonable numbers on sale for Wednesday, Thursday, and Friday evenings – buy them here.

Wendy and Hook

Pirates tricia and Natalie

Tik Tok Crok

Starkey compere

The Darlings

Pirates

Pirate Tom

Wendy Tink loathing

Pirate Paul

Pirate Amanda

Pan scowling

Pan Wendy Tink2

Love Islanders

Rocking out

Hook in his boat

Homepride

Hook upset

Camp Tinkerbell

Added a few phone snaps from the dress rehearsal

Guitar

Capt Hook

pirates

Tink2 Wendy Peter

Love Island Liz

Pirates Megan and Debs

Lost Child, archery

Shocked Tinkerbell

Mermaid

Pirate Code

Mary, Narrator

Hook and Tootles

Mermaid

Director Kerry

Panto cast backstage

Panto cast backstage

Auntie Babs, MS

Spectacles and bowler hat

Do you need a hand?

Birders versus Toggers

Broadly speaking, birders are avian enthusiasts, people interesting in seeing birds. Sometimes birders are twitchers, they like to see a bird so they can “tick” that species off a list, often it involves travelling far from their patch to see a species new to them. Twitchers are often not birders, they’re more akin to collectors, but aren’t necessarily interested in the birds per se. Then there are people with cameras who are also birders, twitchers, or both. Birders and twitchers often refer to these birding photographers as toggers, it’s a rather derogatory word.

Now, if a bird of interest shows up on a patch, the Short-eared Owl for instance, several of which we see out on the Cambridgeshire Fens in winter, then birders, twitchers, and toggers, and every permutation thereof, will generally hear about it and head for the patch, to get a look at the bird through their binoculars, and scopes, to tick their list, and to get that perfect photo.

Often the groups overlap, especially on a small patch, or where there’s a good vantage point. There’s often some sneering among the snobbish members of whichever group who see their particular hobby as being the more righteous.

None of these hobbies have any real claim to righteousness, all of us who indulge are impinging in some way on the wild patch that the birds have chosen to inhabit however temporarily. The presence of humans may well be disrupting the birds’ normal behaviour. So, it’s interesting to hear different people complain about the presence of members of the other groups of enthusiasts if they perceive the activity of the others as being more detrimental to the birds and the environment than their own activity. There is an argument to say that people should leave the wild to the wildlife.

One comment I read on a birding group recently was lamenting the number of people who had turned up at one of our local Cambridgeshire Fens to see and photograph the aforementioned Short-eared Owls (Shorties or SEOs). They said, apparently in all seriousness while lugging their scope up and down the Fen, that all these toggers running around were agitating the birds and making the place like a theme park. They asked the question: “How many photos of one bird do they need?”

Well, without getting into the art and craft of bird photography and why you might need to take more than one photograph, I wonder how they perceive their own position in terms of simply looking at the bird…surely the question might be asked of them “How many times do you need to look at one bird?”

Anyway, I personally feel that I’m just a bird enthusiast with a camera. I don’t think of myself as a proper birder, I don’t know enough. I’m not a twitcher, I’ve rarely “twitched” a species (successfully the European Roller that turned up not far from here, the European Bee-eaters in Norfolk when we were visiting, and the Black-browed Albatross that we failed to see at Bempton Cliffs). And, what photographer would call themselves a “togger”?

Enthusiasts and hobbyists of all creeds need to get over themselves, get over their self-righteousness. They need to not start this kind of argument on a public forum for the sake of assuaging what is probably their own guilt about their hobby and whether it is ethical to impinge on the wild in the first place.

We should all take more care to minimise any detrimental impact we have on wildlife and the environment. And, we should all take care to minimise our snarky comments, which can lead to bad feeling between different factions within a wider community that are to all intents and purposes seeking the same positive satisfaction from their interaction with nature.


Mineral Moon

Processing a RAW photo of the moon to enhance the subtle hues of different areas of the surface needs to be done in stages for best effect. The yellows and blues reveal areas on the surface made up of different minerals, which scatter the incident sunlight to different degrees.

Mineral Moon - 94% waxing gibbous. Blue regions have more titanium-containing basaltic ilminite (titanium iron oxide), yellower regions less.
Mineral Moon – 94% waxing gibbous. Blue regions have more titanium-containing basaltic ilminite (titanium iron oxide), yellower regions less.

A quick glance at the moon in the night sky and you might imagine the surface is fifty shades of grey. But, take a photo, preferably with a telescope or a big zoom lens and you can process the image to bring out the colours in the surface. These colours essentially represent different regions of minerals scattering sunlight in different ways. So with just the right kind of enhancement you can create a geological map of the moon.

I’d heard about this technique some time ago, but hadn’t given it much thought since. But, the moon was lovely and bright last night, waxing gibbous, not full, and I got a quick snap at 600mm on a 2/3 frame mirrorless camera.

The chemicals on the surface of the moon’s seas, the maria (first %), and its highlands (second %)

Silica 45.4%; highlands 45.5%
Alumina 14.9%;  24.0%
Lime 11.8%; 15.9%
Ferrous oxide* 14.1%; 5.9%
Magnesia 9.2% 7.5%
Titanium dioxide 3.9%; 0.6%
Sodium oxide 0.6%; 0.6%

Here’s the RAW shot, unprocessed and loaded into my photo editor. Obviously, I’d messed up, it’s massively underexposed.

So, I re-opened the RAW file out of the camera in DxO PureRaw to apply some initial denoising and let it do some automated camera adjustment based on my lens and camera.

Well, that’s a bit better, but I could perhaps adjust exposure in the photo editor’s own RAW import function and brighten it up properly. The highest exposure compensation is +3.0 in the software and it’s basically done some of the work, but still not enough.

So, I needed to do some basic levels adjustments to get it to this state and you can already see some of those mineral colours showing more than you would see with the naked eye or even through your telescope.

Now, before doing any more, it’s worth applying the photo editor’s automatic colour fix to correct white balance and other potential problems.

Now, to bring out the colours. It would be possible to simply whack up the saturation, but if you do that you get a noisy and solarized (ironically) mess. Although it’s worth trying that, say increasing saturation by 80%, just to see what it looks like. It does show the variations in surface colour that your camera picks up, but like I say it’s an over-the-top result.

So, I reverted that and went to the “layer adjustment window” in my photo editor instead. Ramping up the saturation is possible with multiple adjustment layers so that the effect can be done in a more gradual way to the same level but without losing as much information in one fell swoop as would happen with an 80% saturation boost applied. So, you apply multiple saturation adjustment layers, setting the boost to 20% or so for each, and looking to see how well it works at each step. Alternatively, in my photo editor, I can add a vibrancy adjustment stepwise. That’s what I did for the following image, which had five vibrancy layers of 20% each. Six was too many.

At this point, one might stop. It looks good as it is. But, I next applied a local tone mapping adjustment, which adds a bit more definition to the different coloured regions.

There’s now a need to sharpen and denoise the image again, which I will do by importing into Topaz Denoise AI and choosing some basic settings just to give the final image a bit of a visual bump and tighten things up.

I re-did the whole process using four 20% saturation adjustment layers instead of the more subtle vibrancy to get the following image. I can’t decide which I prefer the previous one or this one.

Mineral Moon – Photo processed to show up the different colours of the surface of the moon that reveal the different mineral present by how they scatter sunlight

To take it to the next level, it is worth doing a burst mode shot of the moon and then using stacking software to overlay them, this is a way to reduce noise. Noise is random in each frame and so overlaying and discarding noise succesively in the software boosts the amount of information you can see in the image and so improves clarity. Applying the above process to such a stacked shot should give you a much better final image.

It’s also worth noting that getting the exposure right in the camera from the off, using a tripod, and live view with either mirror up or in a mirrorless camera will all help improve the images you get.

*More properly known as iron(II) oxide, the lower oxidation state as opposed to ferric, iron(III) oxide more commonly found on earth and as rust.

Dorset 2023

Our Dorset 2023 holiday snaps in no particular order. Scroll down for my four new moths from the week’s mothing and for a ChatGPT “writeup”!

Selfie in The Square and Compass Worth Matravers
Selfie in The Square and Compass Worth Matravers waiting for live music
Viewpoint looking out over RSPB Arne and Poole
Hay bales east of Kimmeridge Bay
Hay bales east of Kimmeridge Bay, Swyre Head – 5-mile clifftop hike
Brownsea Island "castle"
Brownsea Castle, originally known as Branksea Castle
Boat bound for Brownsea Island
Our boat bound for an afternoon on a very wet Brownsea Island
Harbour-front properties, Sandbanks
Harbour-front properties, Sandbanks, the prices of some of these are in the millions
Red Squirrel, Brownsea Island
Red Squirrel, Brownsea Island. We saw at least half a dozen
Chain Ferry between Shell Bay and Sandbanks
Chain Ferry heading to Sandbanks
Corfe Castle from RSPB Arne
Corfe Castle phone snap from the pub!
Corfe Castle phone snap from The Castle pub, Corfe!
Corfe Castle station signal box
Corfe Castle station signal box, we didn’t take the train to Swanage on this trip
Woodhenge, Worth Matravers
Woodhenge, Worth Matravers, behind the village car park near the pub
Edge of Lulworth Cove from cliffs beyond Kimmeridge Bay
Hare
We saw a couple of Hares on the fields beyond the cliffs
Tower/Folly, Kimmeridge Bay
Clavell Tower, above Kimmeridge Bay
Cliffs
Looking back at the Cliffs towards Kimmeridge Bay and Lulworth Cove
Other cliffs
Other cliffs – looking away from Kimmeridge Bay
Routemaster bus in Corfe Castle
An old London Routemaster bus in the town square Corfe Castle
Brownsea Island from the boat
Brownsea Island from the boat, photo by Mrs Sciencebase
No otters
No otters, we had hoped for otters on the shore at Sandbanks
Spoonbill, Brownsea Island
Pied Wagtail, Brownsea Island
Martha Spencer and Archer, The Square and Compass Worth Matravers
Martha Spencer and Archer performing at The Square and Compass
Red Ensign
Red Ensign on our boat to Brownsea Island in Poole Harbour
Redshank
Redshank, Brownsea Lagoon
Osprey, record shot
Osprey, record shot over RSPB Arne, saw 2-3
Sandwich Tern with fish
One of a couple of dozen Sandwich Tern with fish, Shipstal Point, no sign of the US Forster’s Tern
Ringed Plover, Shell Bay
Yet another Spoonbill, one of about 70 on Brownsea Island lagoon
Spoonbills in flight
Spoonbills took flight from the Brownsea lagoon as the rain started
Female Stonechat, near Kimmeridge Bay, one of numerous Stonechat
Female Stonechat, there were lots along the cliff path east of Kimmeridge Bay
Sunshine Spoonbill
Sunshine Spoonbill
Tree, Brownsea Island
Intriguing Tree, Brownsea Island
Anvil Point Lighthouse near Durlston Country Park
Anvil Point Lighthouse, we didn’t dare get any closer, there was no safety fence along the clifftop at this point and it was very gusty!
The newly cleaned Big Globe
The recently cleaned Big Globe at Durlston Country Park
The cottage and neighbours
Out holiday cottage (on the left) and the taller neighbours
Sika Doe, RSPB Arne
Sika Doe, RSPB Arne
Small Copper
Small Copper, RSPB Arne, spotted while we looked for an elusive Dartford Warbler
Speckled Wood
Speckled Wood, RSPB Arne
Red Underwing that had been by the kitchen door
Red Underwing that had been by the kitchen door after the trap had been on overnight
Lunar Underwings
Three very different Lunar Underwings
Heath Rustic
Heath Rustic – new to me in the courtyard garden of our holiday cottage in Corfe Castle
Feathered Ranunculus
Feathered Ranunculus – new for me
Hedge Rustic
Hedge Rustic – seen this species previously in Poulner in the New Forest
Autumnal Rustic
Autumnal Rustic – new for me in Corfe
Common Marbled Carpet
Common Marbled Carpet – a very varied species, not seen this form for a while
Convolvulus Hawk-moth spotted by Mrs Sciencebase
Convolvulus Hawk-moth spotted by Mrs Sciencebase on a sign on a gate, RSPB Arne
European Hornet
European Hornet – mothtrap intruder on a couple of nights during our week in Corfe
The cafe at Durlston Country Park was decorated with panels covered in species names. There were hundreds, including lots of moths. They represent a snapshot of the country park's ticklist
Durlston Country Park’s Seventhwave café ticklist – part of the moth section

Meanwhile, I prompted ChatGPT with the captions for the above photographs and asked it to write an introductory blog post for my holiday snaps slideshow. This is the hilarious write-up with which it came back, perfect for a cheesy travel brochure or airline magazine, hahah.

Exploring the Natural Wonders of Dorset: A Photographic Journey

Dorset, a land of picturesque landscapes, historic treasures, and abundant wildlife, recently played host to my wife and me. Our adventure took us to the charming village of Corfe Castle, where we found respite in a lovely cottage, and embarked on a thrilling exploration of the region’s natural beauty and cultural heritage.

Our journey began at the heart of Dorset’s community spirit, The Square and Compass pub in Worth Matravers. Here, we revelled in an afternoon of live music and captured a joyful selfie to mark the occasion.

The lush landscapes of RSPB Arne and the sparkling waters of Poole unfolded before us at a breathtaking viewpoint, reminding us of nature’s grandeur. Meanwhile, the quaint charm of Corfe Castle, seen from both RSPB Arne and The Castle pub, left us in awe of the region’s rich history.

As avid birdwatchers and wildlife enthusiasts, we made our way to Brownsea Island, a sanctuary for red squirrels, ospreys [over RSPB Arne], spoonbills, and more. The sight of these remarkable creatures in their natural habitat was a true delight, and we even spotted an osprey in flight, capturing a record shot.

Kimmeridge Bay’s dramatic cliffs, Lulworth Cove’s edge, and the tranquil beauty of Sandbanks added to the visual splendor of our journey. We marvelled at the historic treasures like Brownsea Castle and Woodhenge, offering a glimpse into Dorset’s fascinating past.

Our days were filled with the beauty of nature, from the intricate patterns of butterflies to the enchanting flight of spoonbills. Each moment was a testament to Dorset’s natural wonders.

Join us on this visual journey through Dorset’s landscapes and wildlife, as we share the stories behind each photograph. From quaint villages to pristine nature reserves, Dorset is a treasure trove waiting to be explored, and we hope our photos inspire you to embark on your own adventure in this remarkable corner of England.

Prize-winning butterfly

I rarely enter competitions these days, although I’ve got a few science writing awards under my belt going back more years than I care to admit. However, back in the summer, a local wildlife charity was touting for entries for a photo competition themed around its New Life on the Old West remit…

My prize-winning photograph of a Green Hairstreak butterfly
Green Hairstreak

The charity is involved in wildlife habitat enhancements in green spaces and surrounding countryside within areas close to the Old West River in the Cambridgeshire Fens. So, I thought I’d enter a butterfly photo, specifically a snap I took locally of a rare Green Hairstreak in a local woodland. I then encouraged photographer friends and followers on social media to enter too, healthy competition and all that.

I learned earlier today that my snap had been picked as the winner in the adult category, which is rather gratifying. RSPB membership as a prize. Can’t be bad. Congratulations to young Alfred for his Ruddy Darter, which won the under-18s category, and to all the entrants featured on the website. Special mention to Andy Hoy for his Vampire Deer (Chinese Water Deer).